I often am asked why I debarb my hooks in my tying videos. Fortunately, years ago I wrote and article on this subject based on what I would talk about in my beginning fly tying class as this subject almost always came up. It took me awhile to find the article as it was saved on an old blog I used to participate in but I have found it and below is a few things to think about when tying and fishing your flies. I have posted the article on
Dressed Irons website ( https://dressedirons.com/28351/to-barb-or-not-to-barb/ ) but wanted to share it here as well. The formatting is a little better on the website which some people might like better.
-------------------------------------------------------------------------------------------------------
To Barb, Or Not To Barb?
Everyone I know who has been fishing for a while or is new to fishing at some time or another asks me my opinion on barbed versus barbless hooks. Most people know that I seldom have a strong opinion about most things in fishing because so much of it is subjective (it is just fishing, it is not life and death) however, I do have an opinion about this particular subject. It is one of the very few soap boxes I will get up on in my tying classes.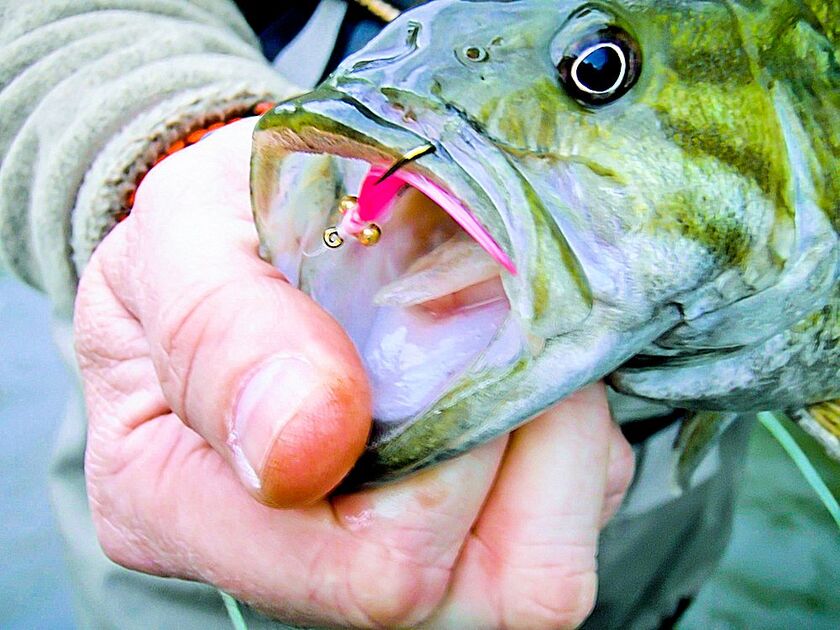 Off the bat I will tell you I am a big advocate for barbless hooks. There are a number of reasons for this view which taken together make me someone who debarbs my hooks and if I am guiding insist clients fish debarbed hooks. But before I get into the specific reasons let me you enlighten you on a few things about me. First, I love fresh cooked fish. Not quite as much as fresh sizzling T-bone but almost. I practice catch and release about 98% of the time but in certain circumstances I will harvest a fish or two. Having grown up fishing in the early 70's, just as catch and release was gaining ground I can tell you the pickings on some of my fishing holes were slim due to over harvesting. By the mid-eighties it was amazing how great the fishing had become as more and more people left behind what they caught. However, I was not opposed to taking home a stringer full of big bluegill or crappie from a healthy body of water every once in a while. So, I am not an advocate of barbless hooks because ALL fish should be released. Nor am I concerned about "hurting" the fish. Hurting in the sense of inflicting pain on them. I am concerned about doing undo damage to fish in the process of catching them. If I were concerned about "hurting" the fish then I would not be fishing at all.
There are other reasons for going barbless which I will elaborate on shortly. There is one particular reason that most people do not consider which I think is the biggest reason to go barbless. The reason is that you get better hook sets. I am certain this can and will be argued. I have read more than a few papers on the pros and cons of this subject in terms of catch rates. This not a scientific article and I will not make it into one. What I will do is relate my own experiences.
First off, barbs on hooks are a hold over to live bait days. If you head over to the O. Mustad web site you will find a interesting page concerning the history of hooks. It seems the earliest hooks had no barbs on them. The predominant thought is that the barbs were added later to facilitate keeping live bait on the hook. So, since we are not using live bait we don't need the barb; right?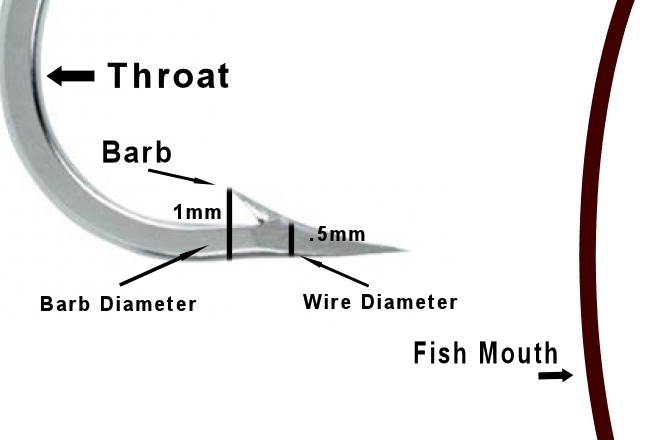
It is a common misunderstanding that the barb is needed to keep the fish from "spitting out" the hook while fighting. While this might be a nice side effect of the barb the reality is that in more cases the fish spits out the hook because of a bad hook set. The bad hook set can actually be the result of the barb on the hook. Illustration #1 shows the inside of the fishes mouth and a typical hook in the mouth. The particulars of the mouth are not important for this because whether you are setting the hook into soft flesh or bone the issue is the effect the barb has on the overall hook set. Lets assume the diameter of the wire of the hook we are using is about .5mm. Depending on the fish you are trying to catch and the tippet you are using, a little or a lot of force will be needed to set the hook. For argument lets say it is about 2 pounds.
So, when the fish bites you pull back on the fly using two pounds of pressure. The hook point encounters the mouth and pushed the flesh/bone out of the way so the wire can be inserted into the mouth. The idea being that you want the wire to slid into the mouth all the way back as far in the throat of the hook as possible.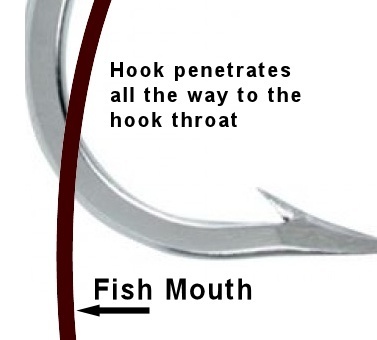 In this example let us assume the two pounds of pressure is enough to open up the flesh/bone for the wire to move into the fishes mouth. Now the hook slides in fine until it hits the barb. At the spot where the barb is elevated the most lets say we have now doubled the diameter (1mm) of the required hole in the mouth of the fish needed to get this hook in all the way past the barb. It is a simple matter of physics, the wire went from a small diameter, requiring less pressure to open up the mouth, to a large diameter because of the barb and hence will need more pressure to achieve the same quality hook set. For argument sake, since our wire diameter doubled we will say we need to double the pressure; four pounds. What happens if we do not apply enough pressure? The hook does not get embedded into the fishes mouth as far as it needs to and can more easily become dislodged. One could even argue that if the hook is not embedded past the barb then the barb itself will apply pressure in the opposite direction and possibly aide in the the hook coming out of the mouth.
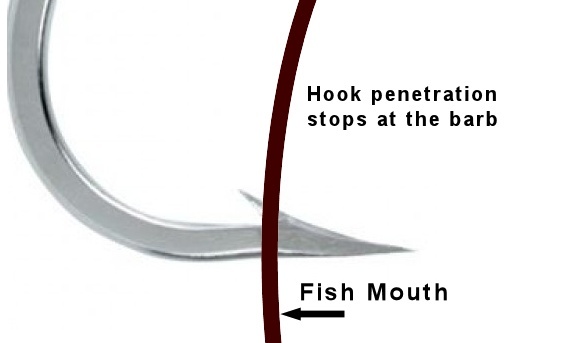
In my years of fishing I have found two things that mostly effect my hook sets while fishing. The first is whether or not I am applying enough pressure on the hook set. Face it, not every tap, bump, nudge, or strike is a definitive "hit" and sometimes you half heartedly setting the hook because you suspect a fish but don't really know. In these cases I have often had the fish spit out the fly and I know it is because of a weak hook set. However, the other culprit is a dull hook. Weak or strong power in the hook set can and will be effected by a dull hook. Many times I have been fishing smallies and had them spitting out my fly. After two or three in a row I either change the fly to a fresh hook or sharpen the hook and no more spat flies. This is why it is always a good idea to have more than one of a particular pattern and a hook sharpener with you while fishing. Even though you may not loose your Clouser Minnow in the rocks or your popper on that log it is quite possible the hook is now not as sharp as it was when you first tied it on.
As I mentioned earlier, I have read many reports of the effects of barbed vs debarbed hooks. I can and do see the pluses and minuses, but for me just the simple fact that I can, and do, get better hook sets is enough for me. But I won't stop there. If nothing else, a debarbed hook is easier to get out of your cloths, your fishing buddies cloths, the net and even your own skin. I know too many people that lost a day of fishing, at home and abroad, because of a hook lodged in their person that had to get medical attention to be removed. That alone is worth debarbing. Whether I catch that next fish is not as important as enjoying the day out fishing. There will always be more fish.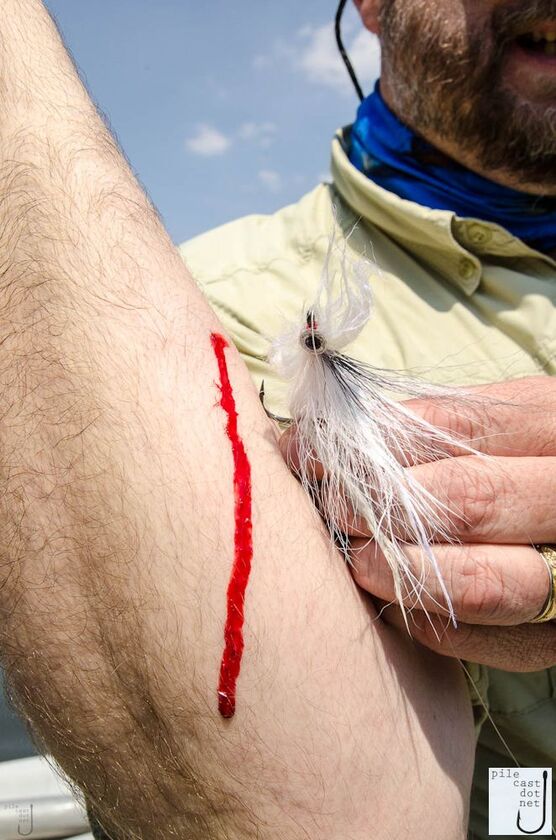
I welcome feedback and thoughts on this subject; both positive and negative. If you know of an papers or study done to support or refute this please let me know. I am certain it will be an ongoing debate, probably long after I am no longer fishing in this world, but knowledge is power and I always want to know more.
- Ian Anderson

Dressed Irons Guild
The Dressed Irons Guild is a fly tying community which is all about sharing fly tying knowledge with a bit of fly fishing thrown in. The goal of the Dressed Irons Guild is to build a community of people who love fly tying and want to learn and share what they know. If nothing else it a place to come and ask questions of other to (hopefully) get the information you need. As well as talk some about fly fishing along the way!
Interested? Want to learn more about the community?
Dressed Irons@DressedIrons
April 19, 2023
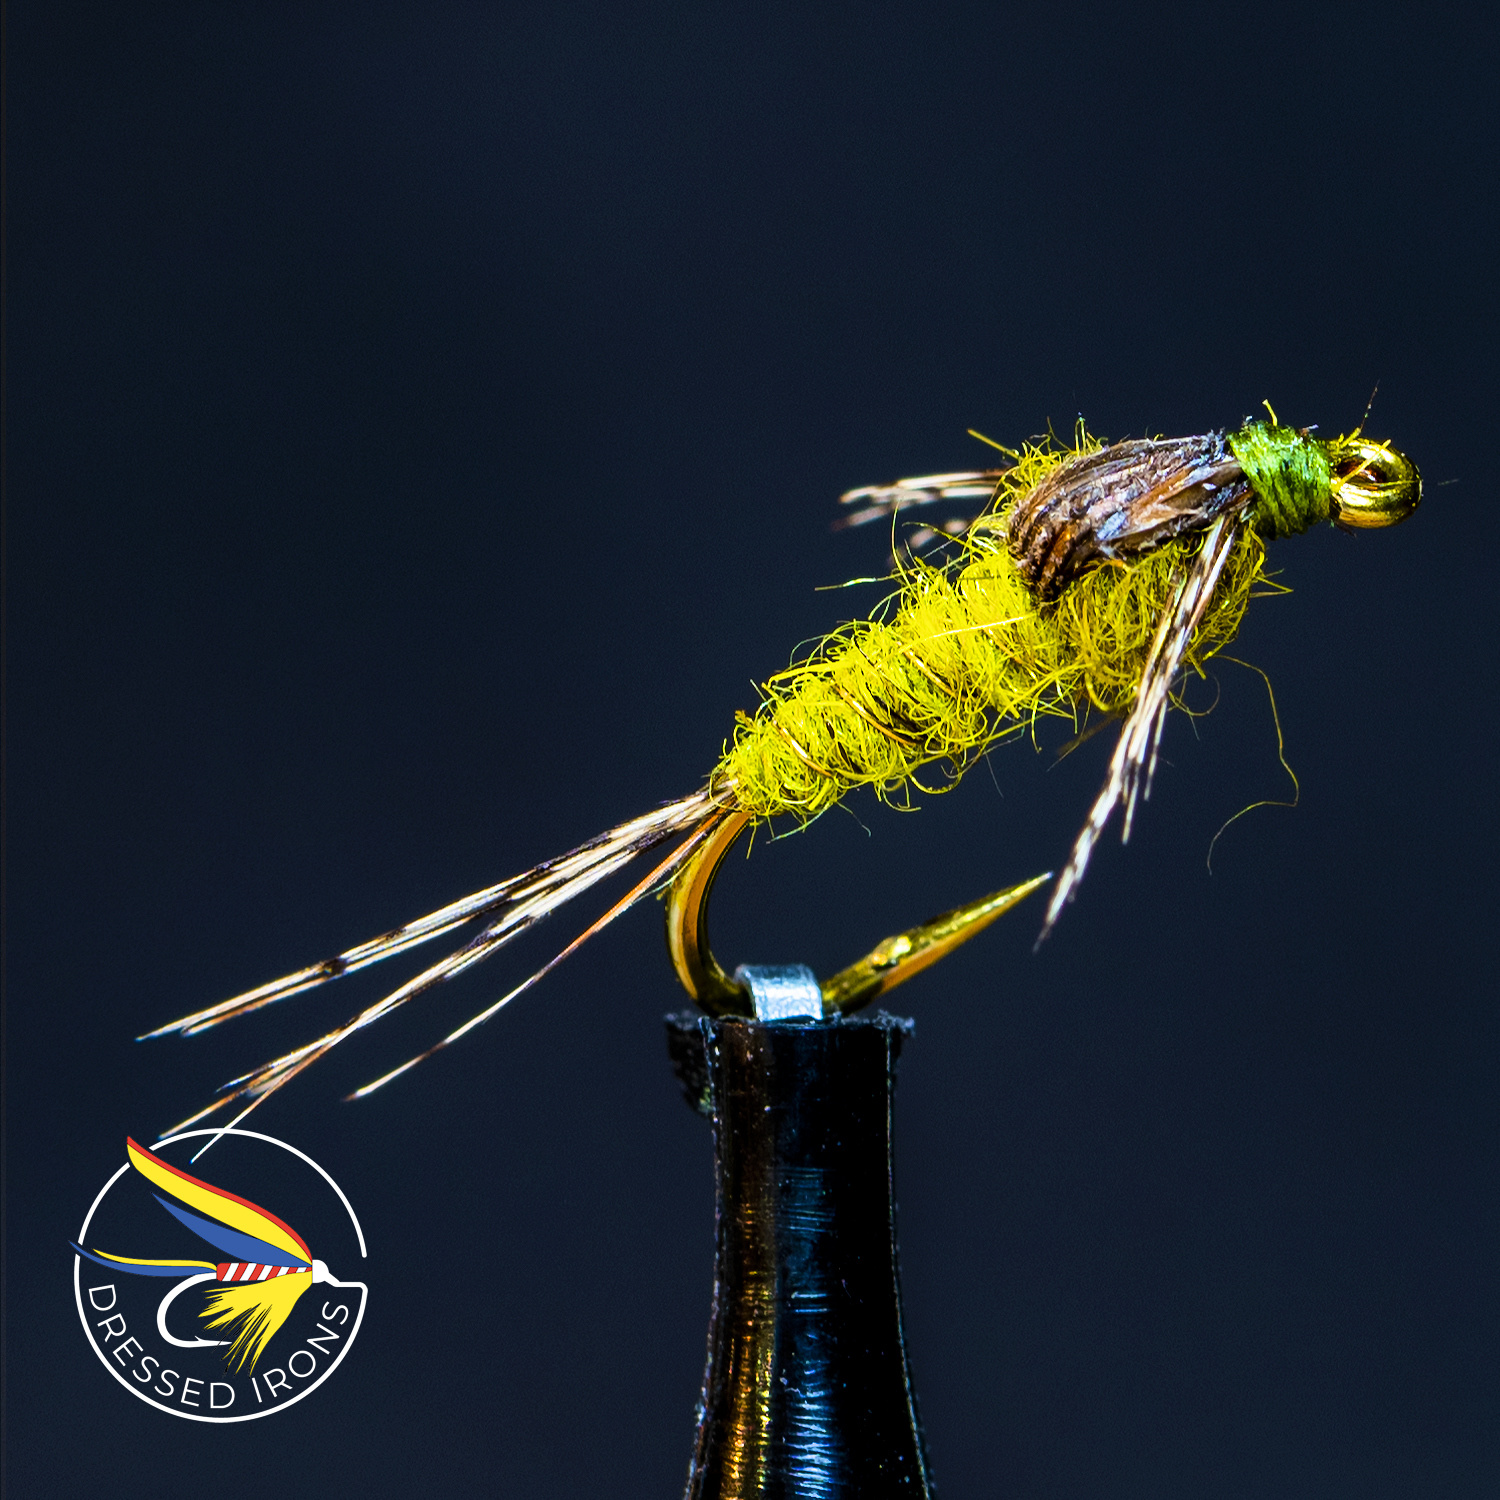
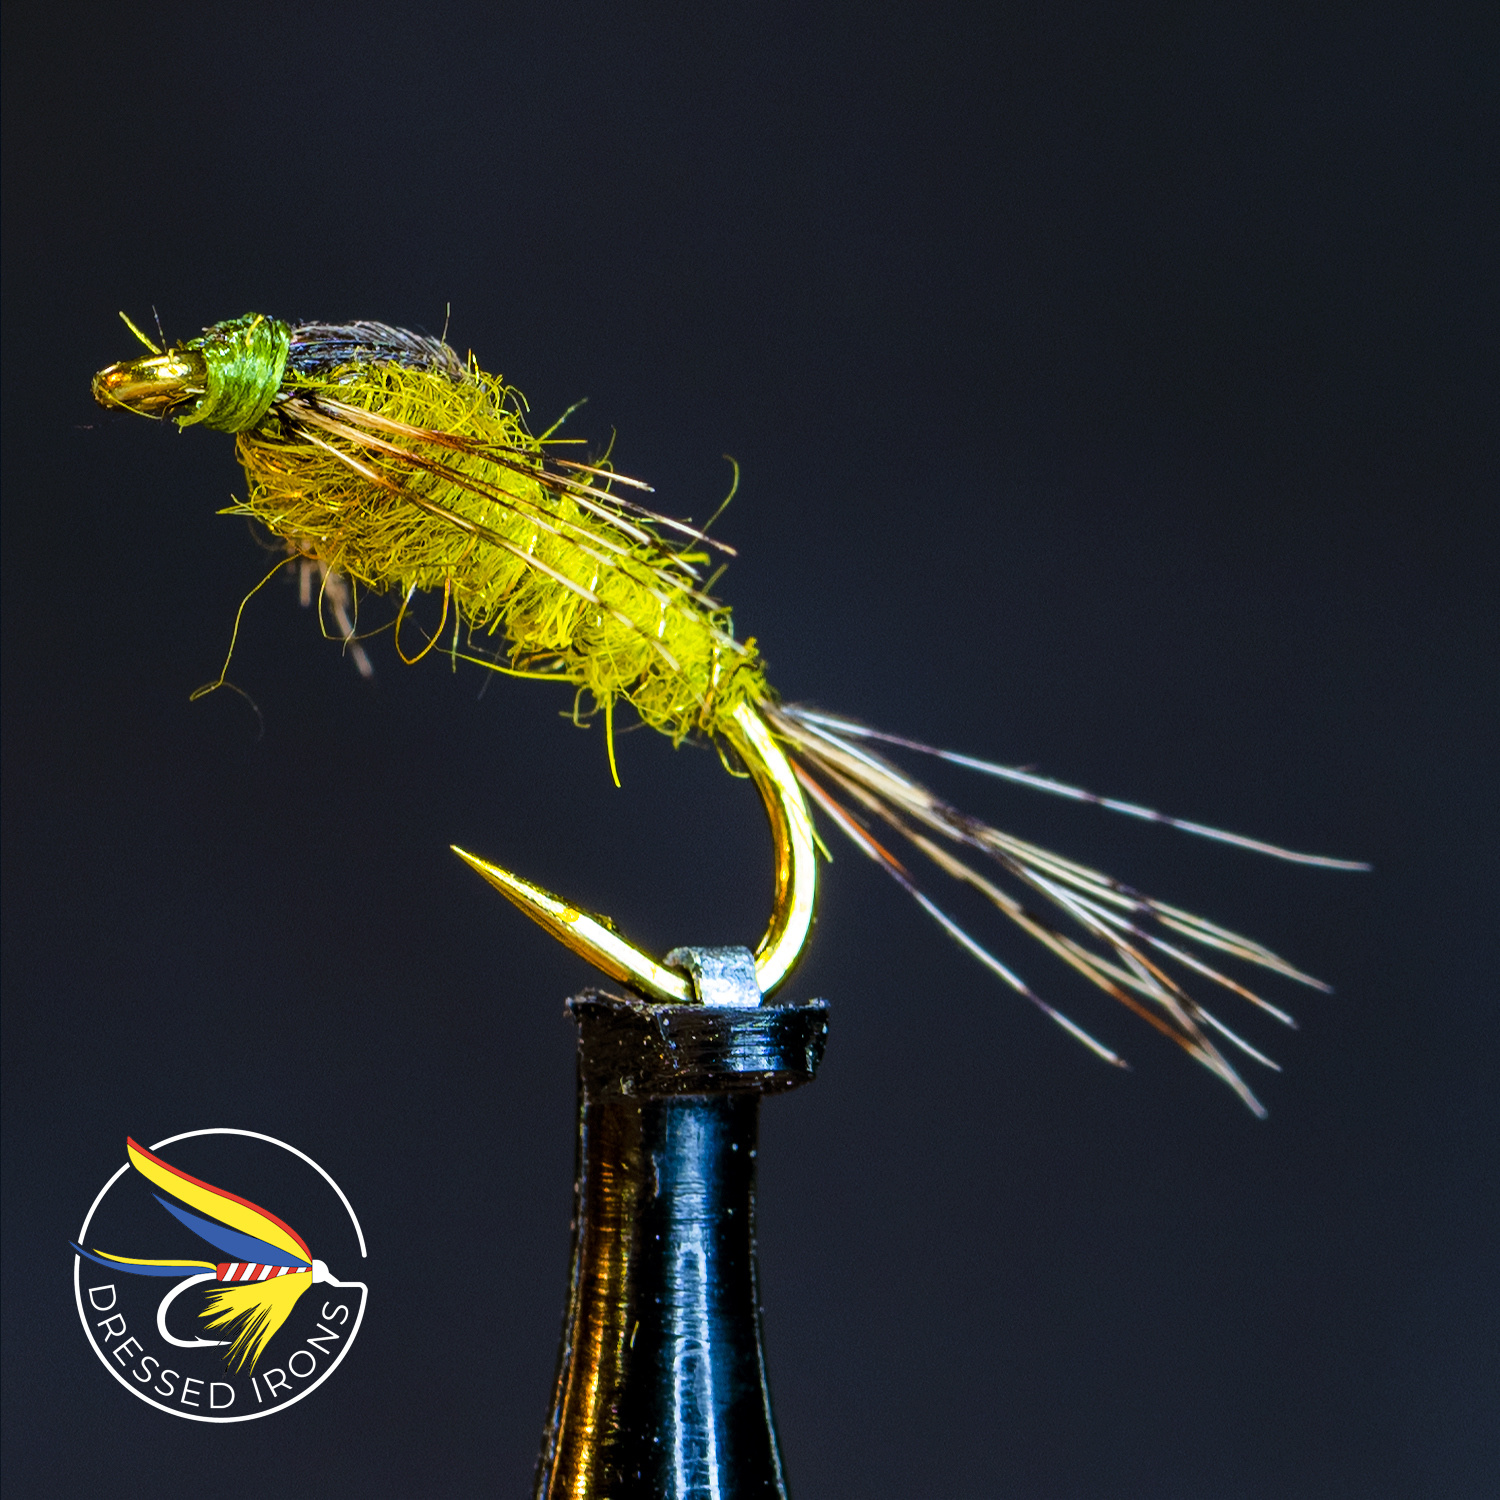
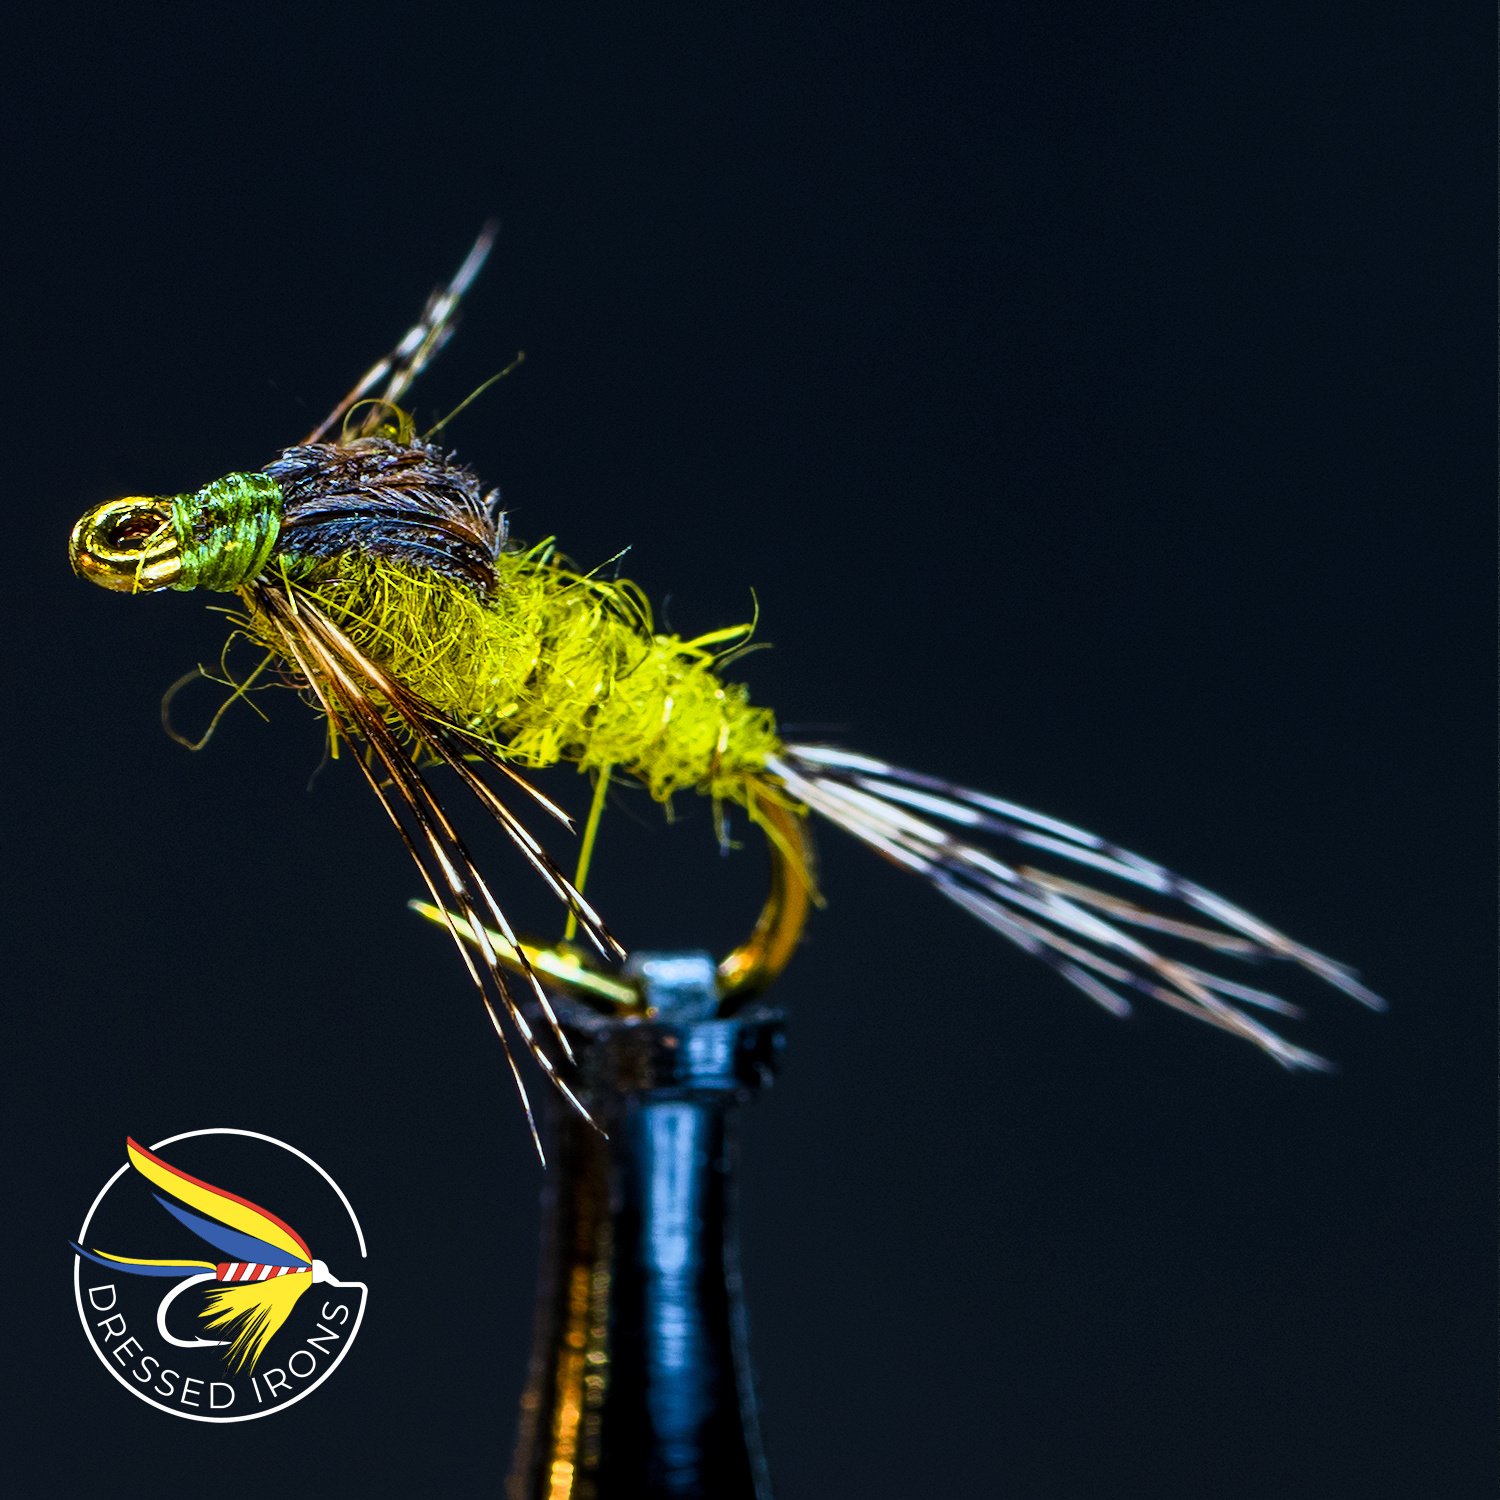
Tying the BWO Nymph
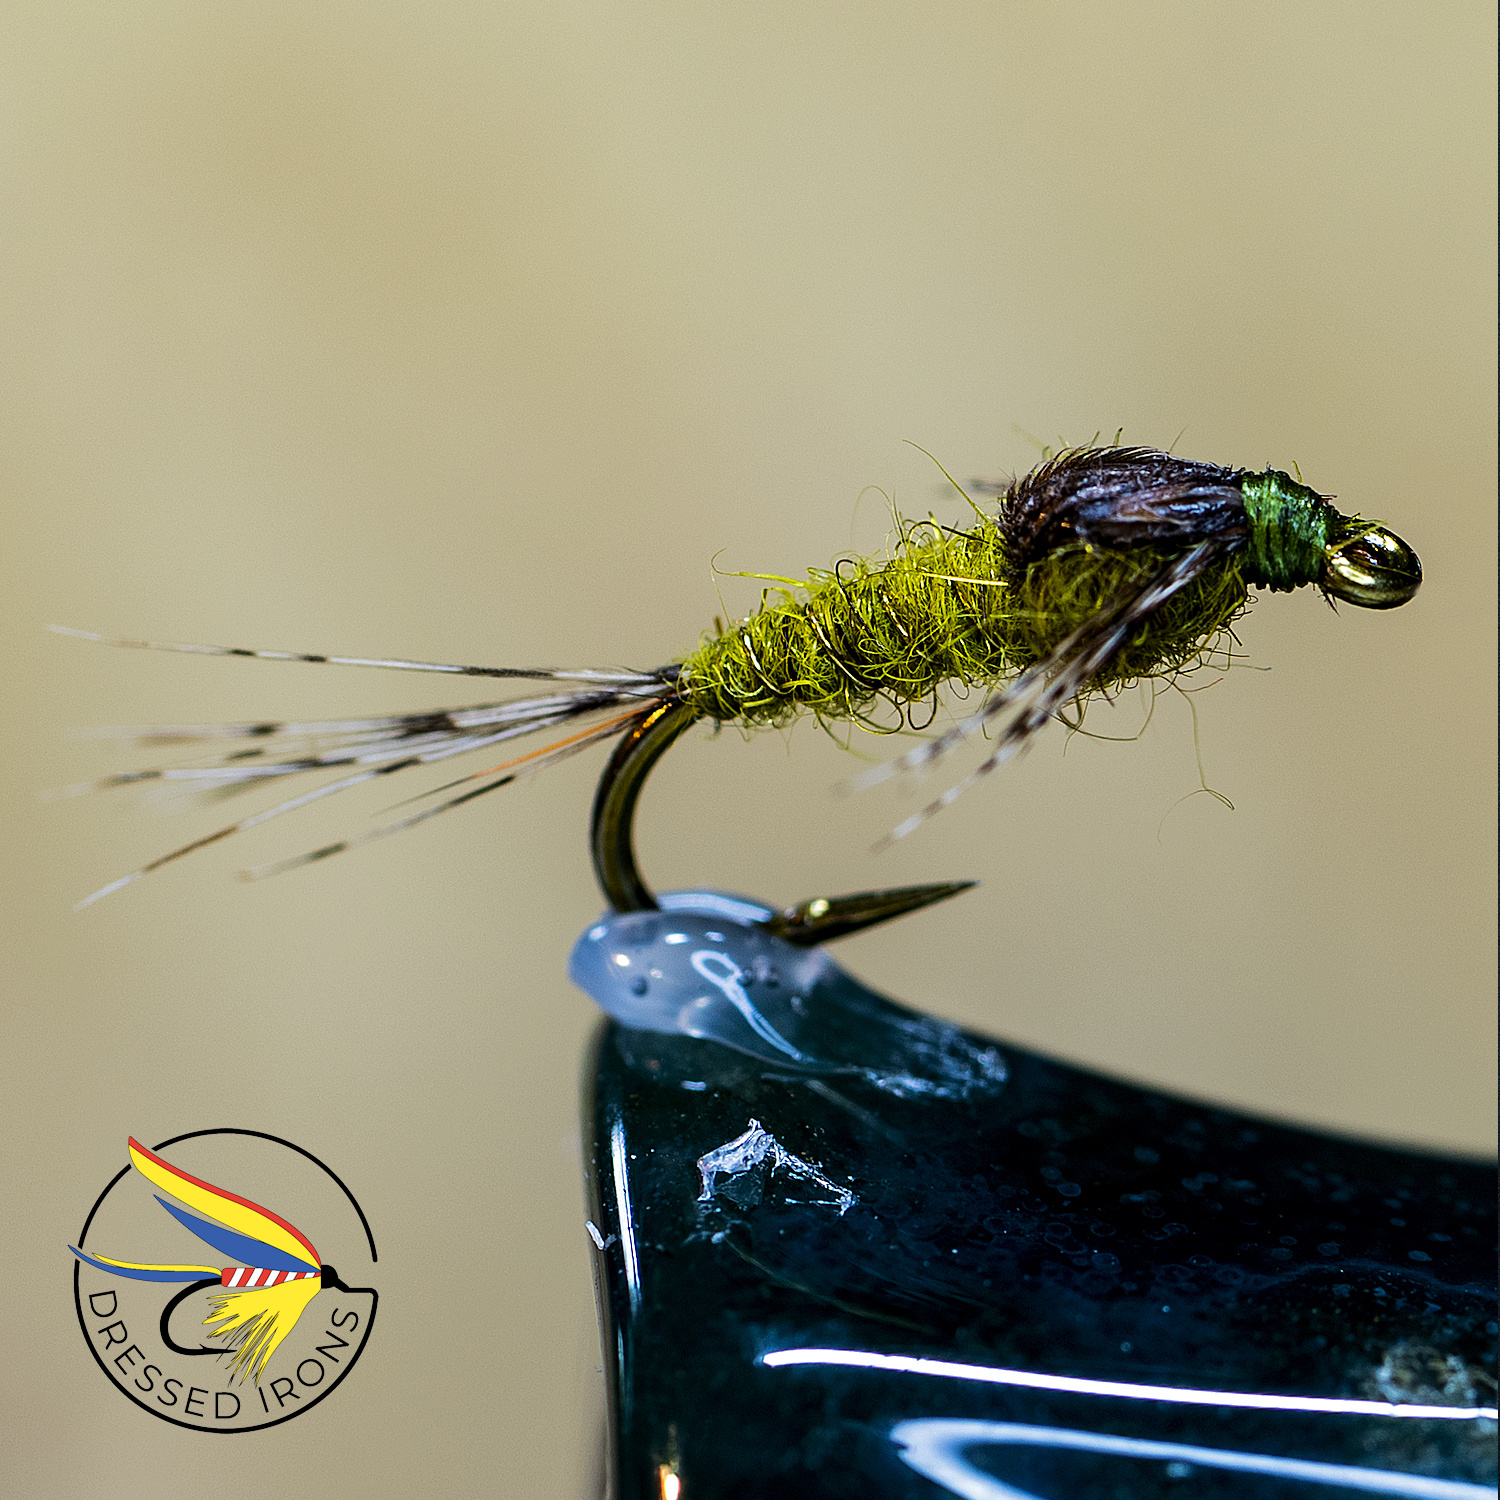
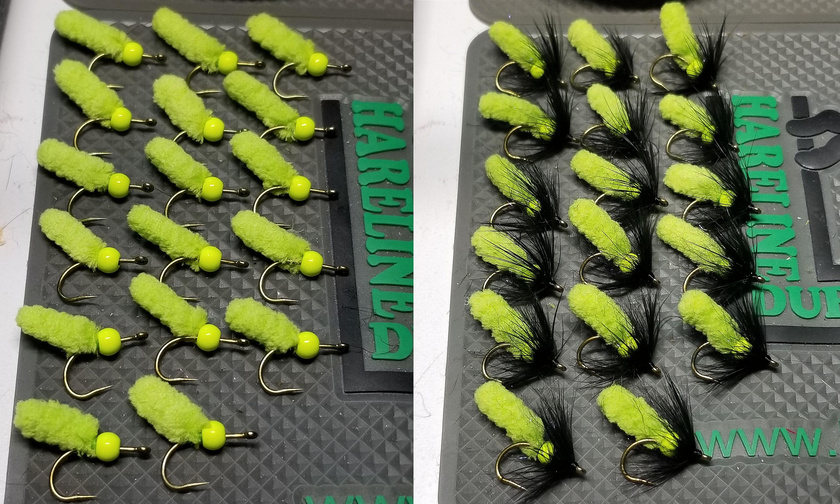
Even though there are not a lot of trout here in the Midwest what we do have is almost in season. That means small nymphs and dry flies for much of the fish you will be targeting; especially if you like targeting them during active hatches. The latest fly from Dressed Irons is the BWO nymph. The Blue Wing Olive (BWO) nymph, although specific to the Blue Wing Olive (Baetis) mayfly is a simple pattern that can also be fished as a general nymph attractor pattern. Usually tied for the fall Blue Wing Olive season, it can be tied in various colors to work with all sorts of mayfly species.
There are many different BWO nymph patterns and this one by no means is the best of all of them, however I like it because it is simple, quick and can be changed up to work in many fishing situations. Give it a try in your vise and on the water, I think you will find it will help your time fishing! -- Enjoy
Step by Step showing you how to tie the BWO nymph.
Hook: Mustad 3906B, #12-#16
Thread: Uni-Thread 8/0, Olive
Tail:...

Interested? Want to learn more about the community?
What else you may like…
Videos
Posts
Articles
Not Always Perfect
So my recent trip to the Bayou did not produce any Redfish, due to my own error, but I did manage a couple of nice Black drum. I did get shots at fish everyday and 95% of the places we stopped to look for fish we found them. However, there was much tumultuous weather, muddy and high water and fish that just did not seem too interested.
As I mentioned, I did connect with one nice Redfish but through the fate of the fish gods it was not landed. It was a classic shallow Redfish shot with the fish tight against the bank with his back out of the water. I placed the fly about a foot in front of his face and the second the fly landed he charged it and took it. It happened so fast I thought for a second I spooked the fish as it turned towards the boat with a flash of it's tail and began moving out. I scrambled to bring in the slack to set the hook and eventually did. The fish immediately headed for deeper water and started ripping out the slack line. But the fish gods were smiling on him as...
00:01:49
Roseate Spoonbills
Seems to be a larger number of Roseate Spoonbills in the Bayou this season. Glad there is!
Ian
00:01:42
Video Update
As I mentioned in yesterdays post, I created a video update mentioning the various things going on and that I am working on. Here is that video. I mentioned in the video two other videos I am working on, the video on different angles of fly tying as well as a Q&A video. Both of those have been recorded and I will be processing those over the weekend.
I hope everyone has a great Memorial Day weekend and makes some time on the water!
Ian Anderson
00:04:41
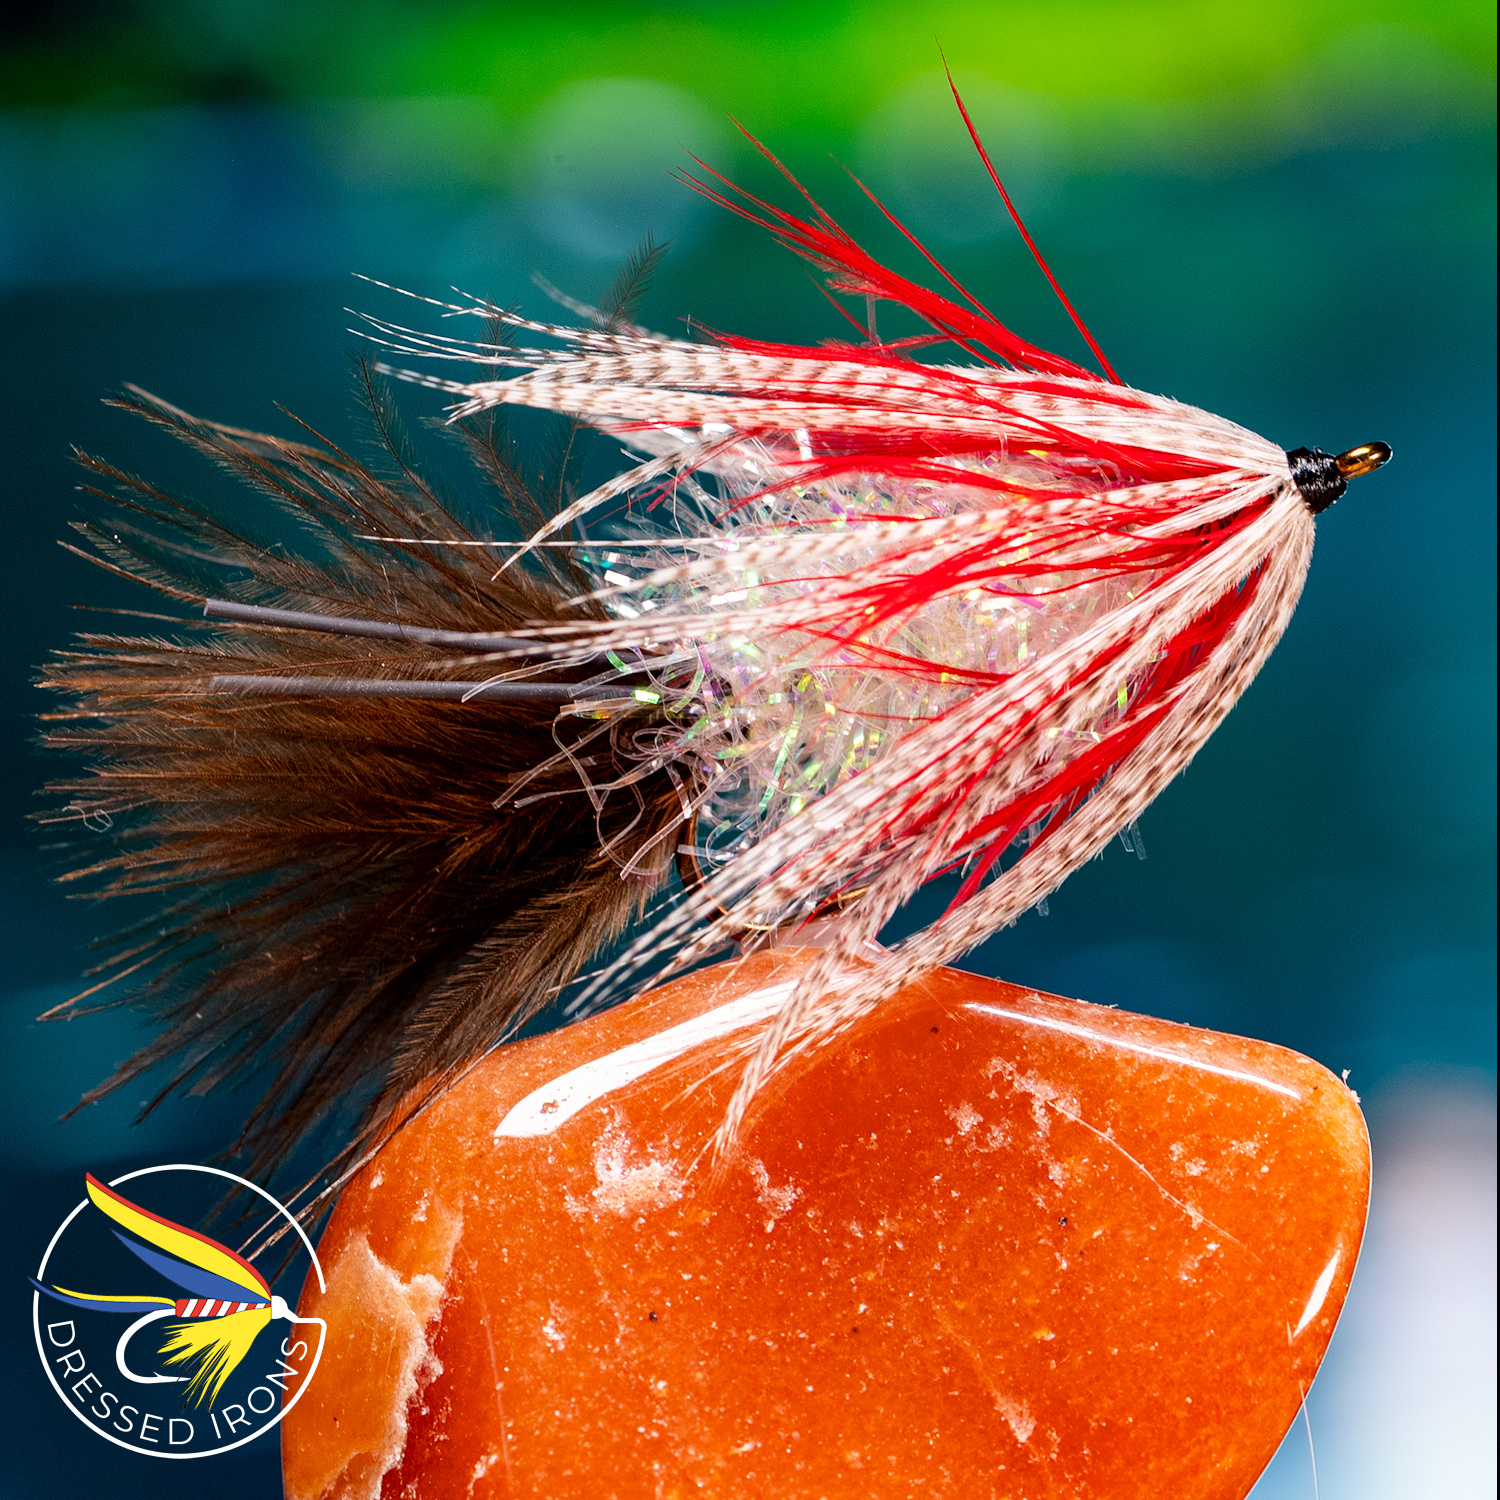
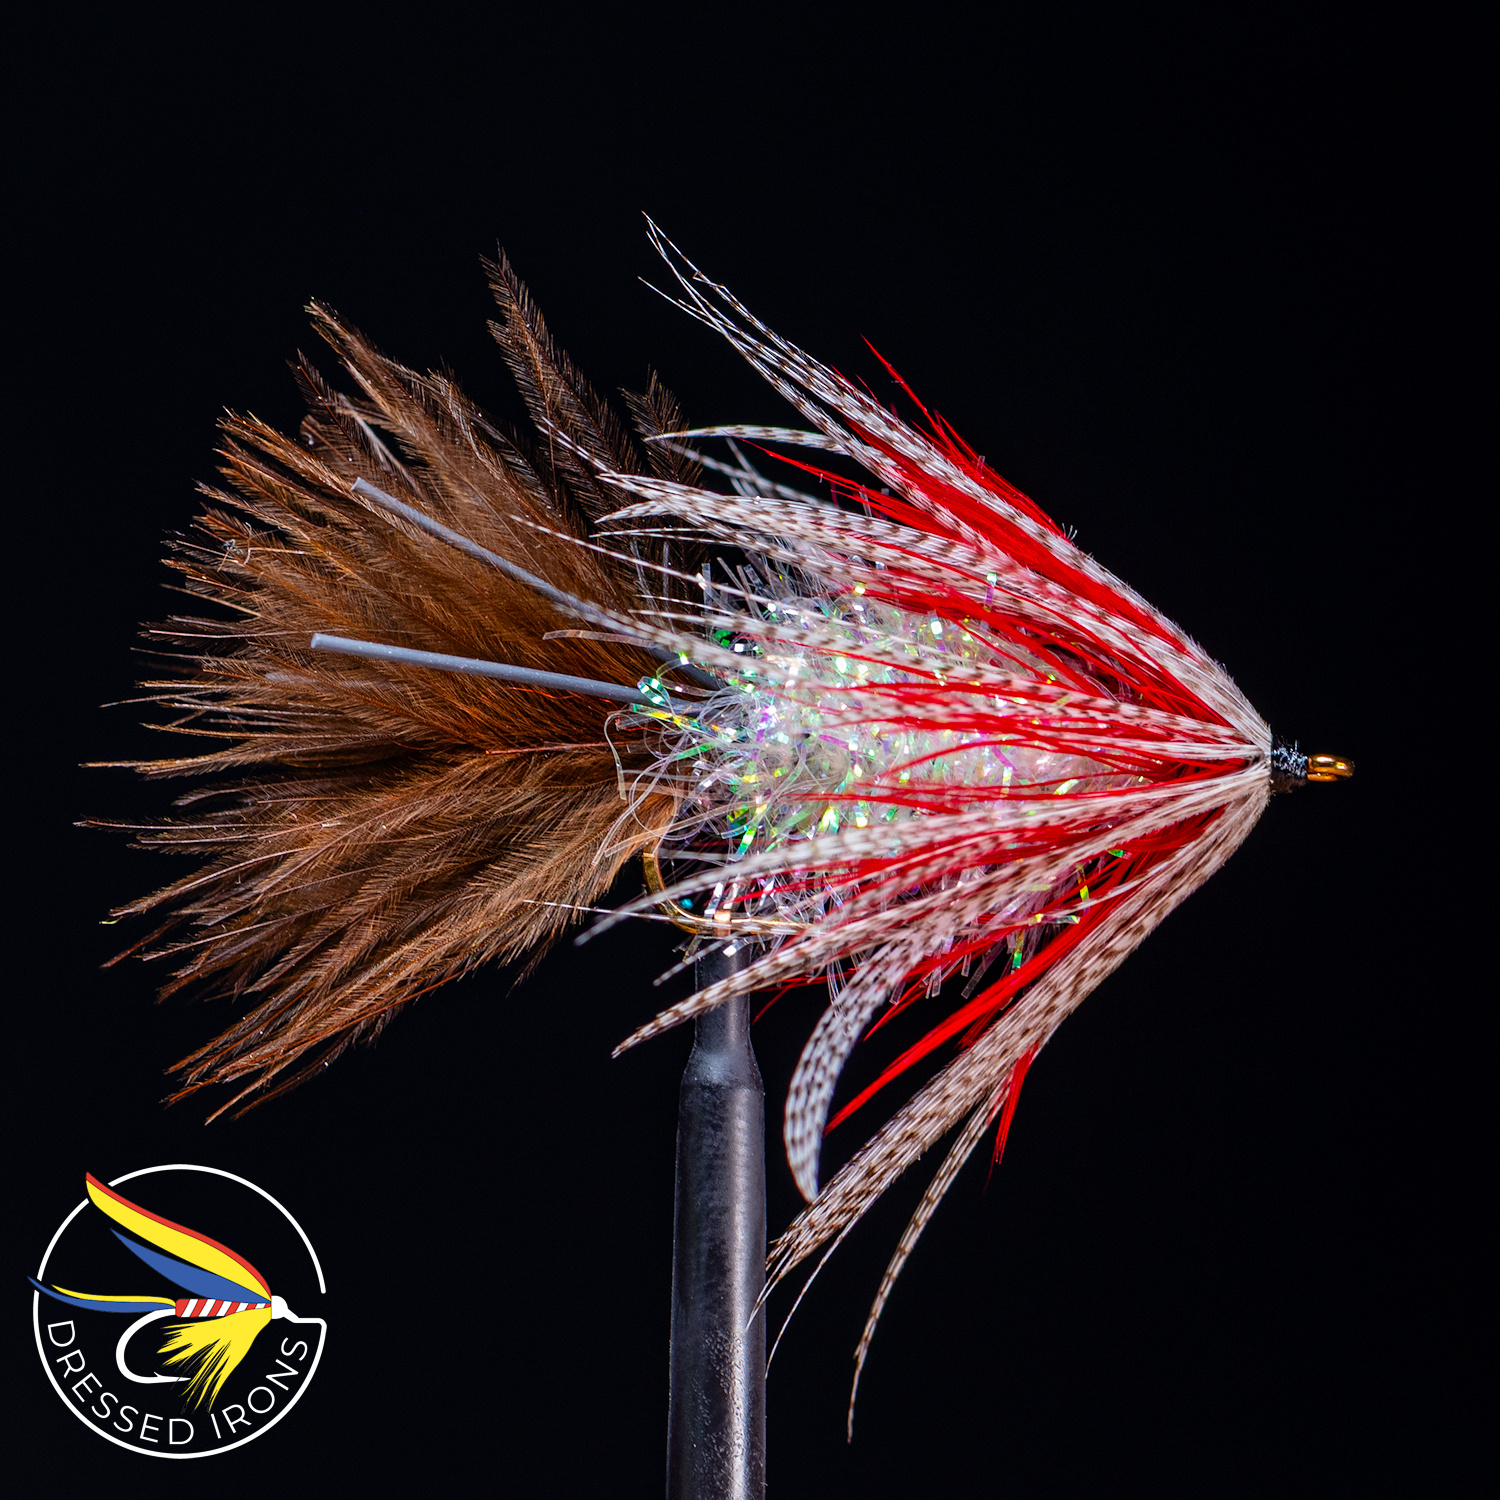
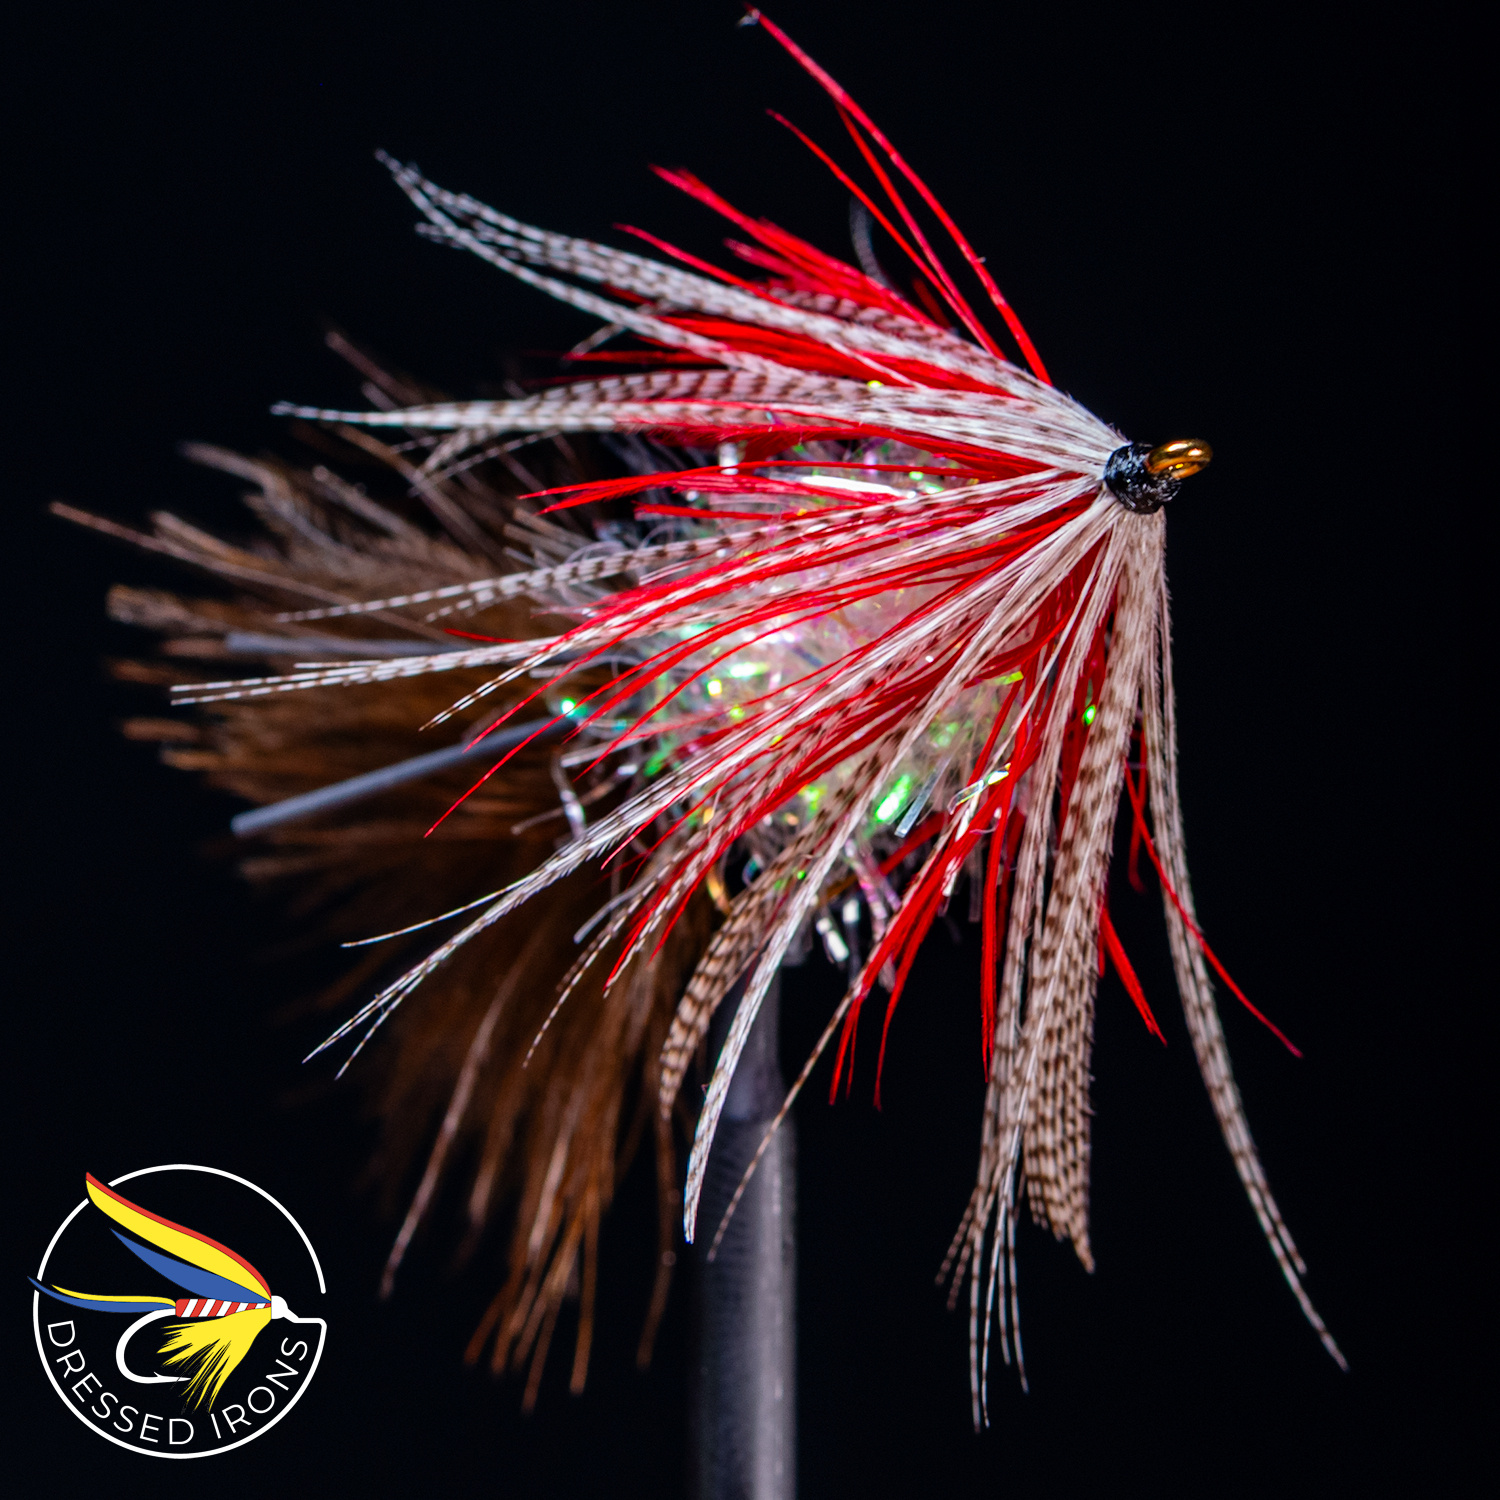
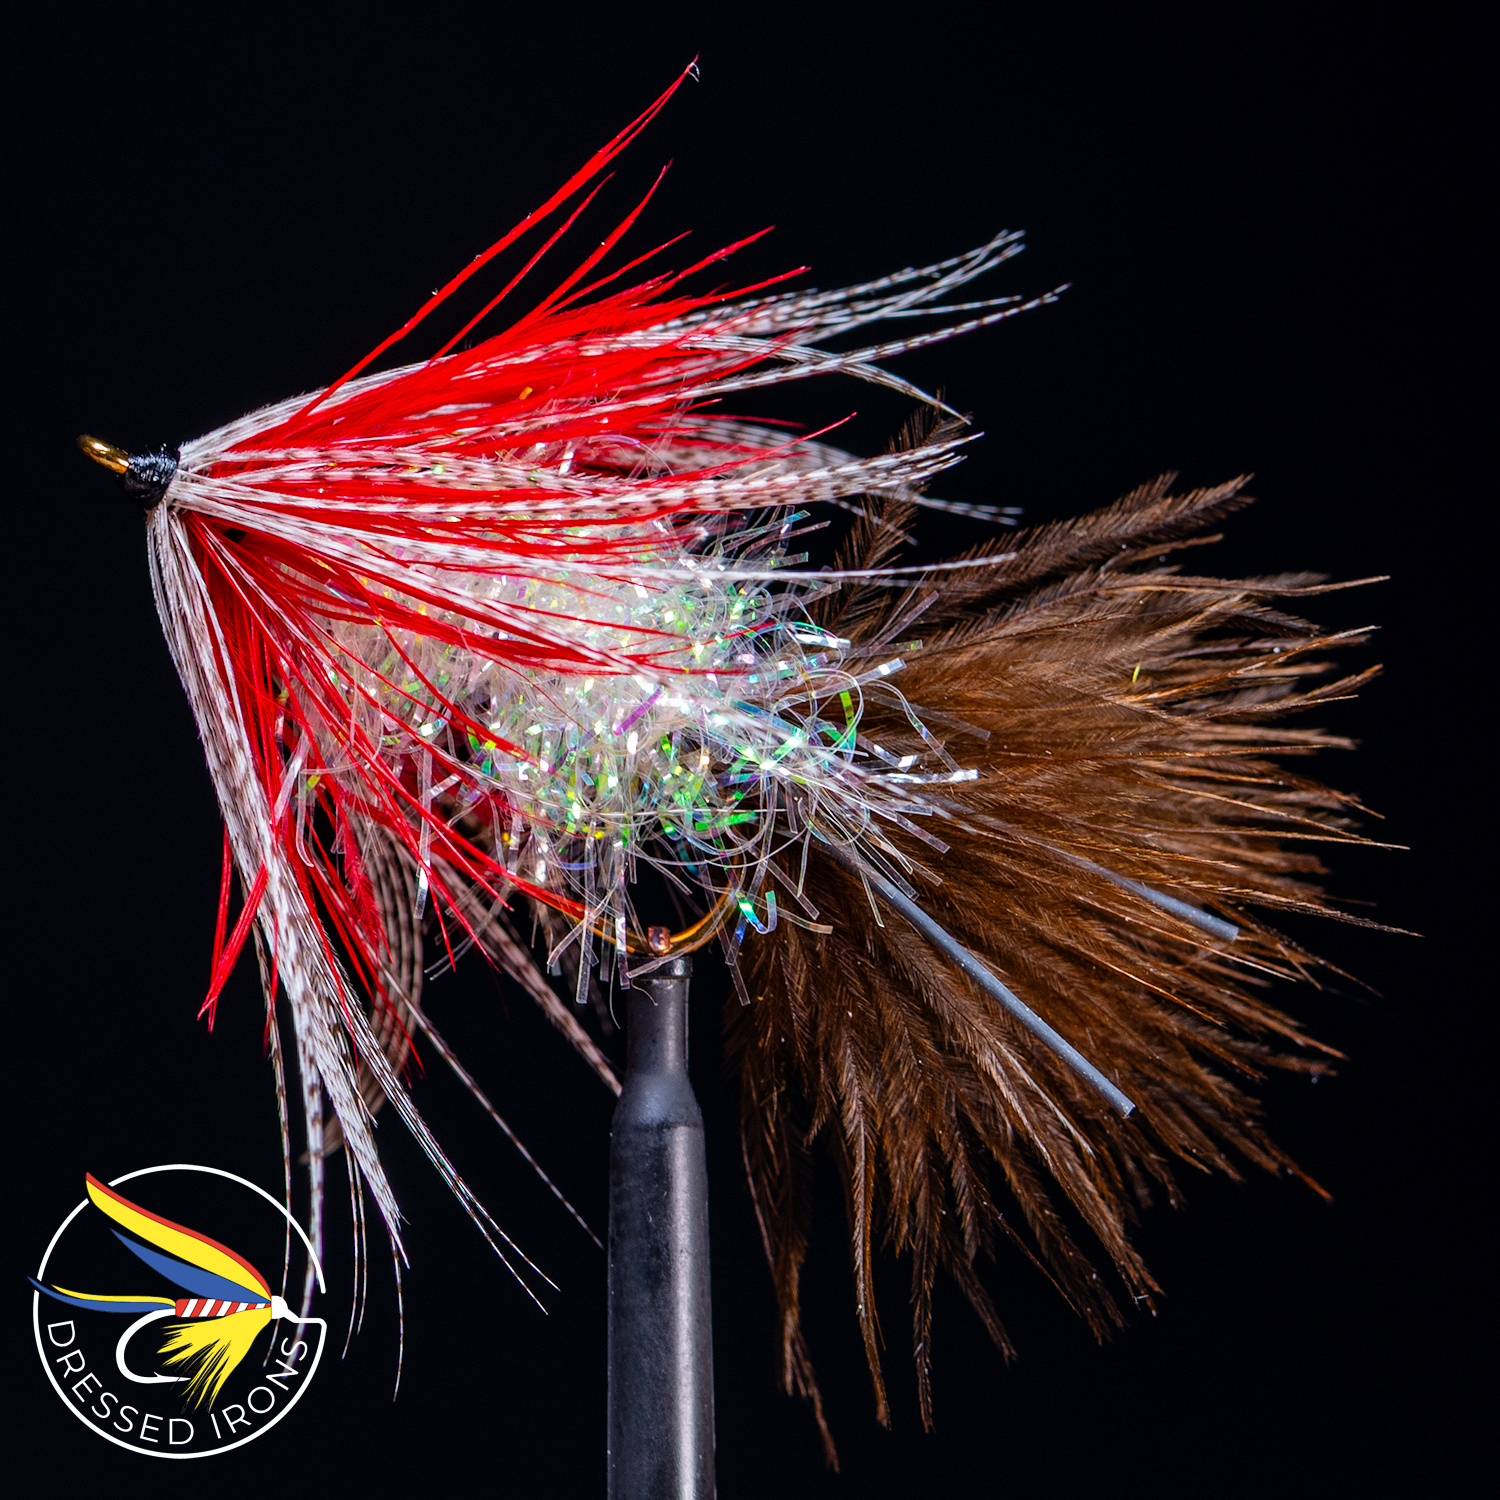
Remnant Fly 44 - Soft Hackle Streamer
This is the 44th fly in a series of flies I call Remnant Flies. If you haven't seen the introductory video on the Remnant flies then head over here to view it - diflytying.locals.com/post/1559443/remnant-fly-introduction-dressed-irons.
The latest Remnant Fly is sort of a Soft Hackle Streamer. This fly started out a little different as I wanted to place a bead in the front of it. However, the bead I wanted is more for the articulation section of a articulated fly than for making a bead head on a fly. This is because I could not get the bead around the bead of the hook and there was not a larger hole on one side like on beads that are used for making bead head flies. This fly could also benefit from a cone on the front and/or some lead along the shank. --Enjoy
Hook: Mustad R75, #6
Thread: Danville 6/0 in White and Black
Tail: Marabou, Brown & Black Round Rubber Legs
Body: Estaz, Pearl
Hackle: Schlappen - Red & natural Mallard Flank
As I continue the Remnant fly series this and all future ...
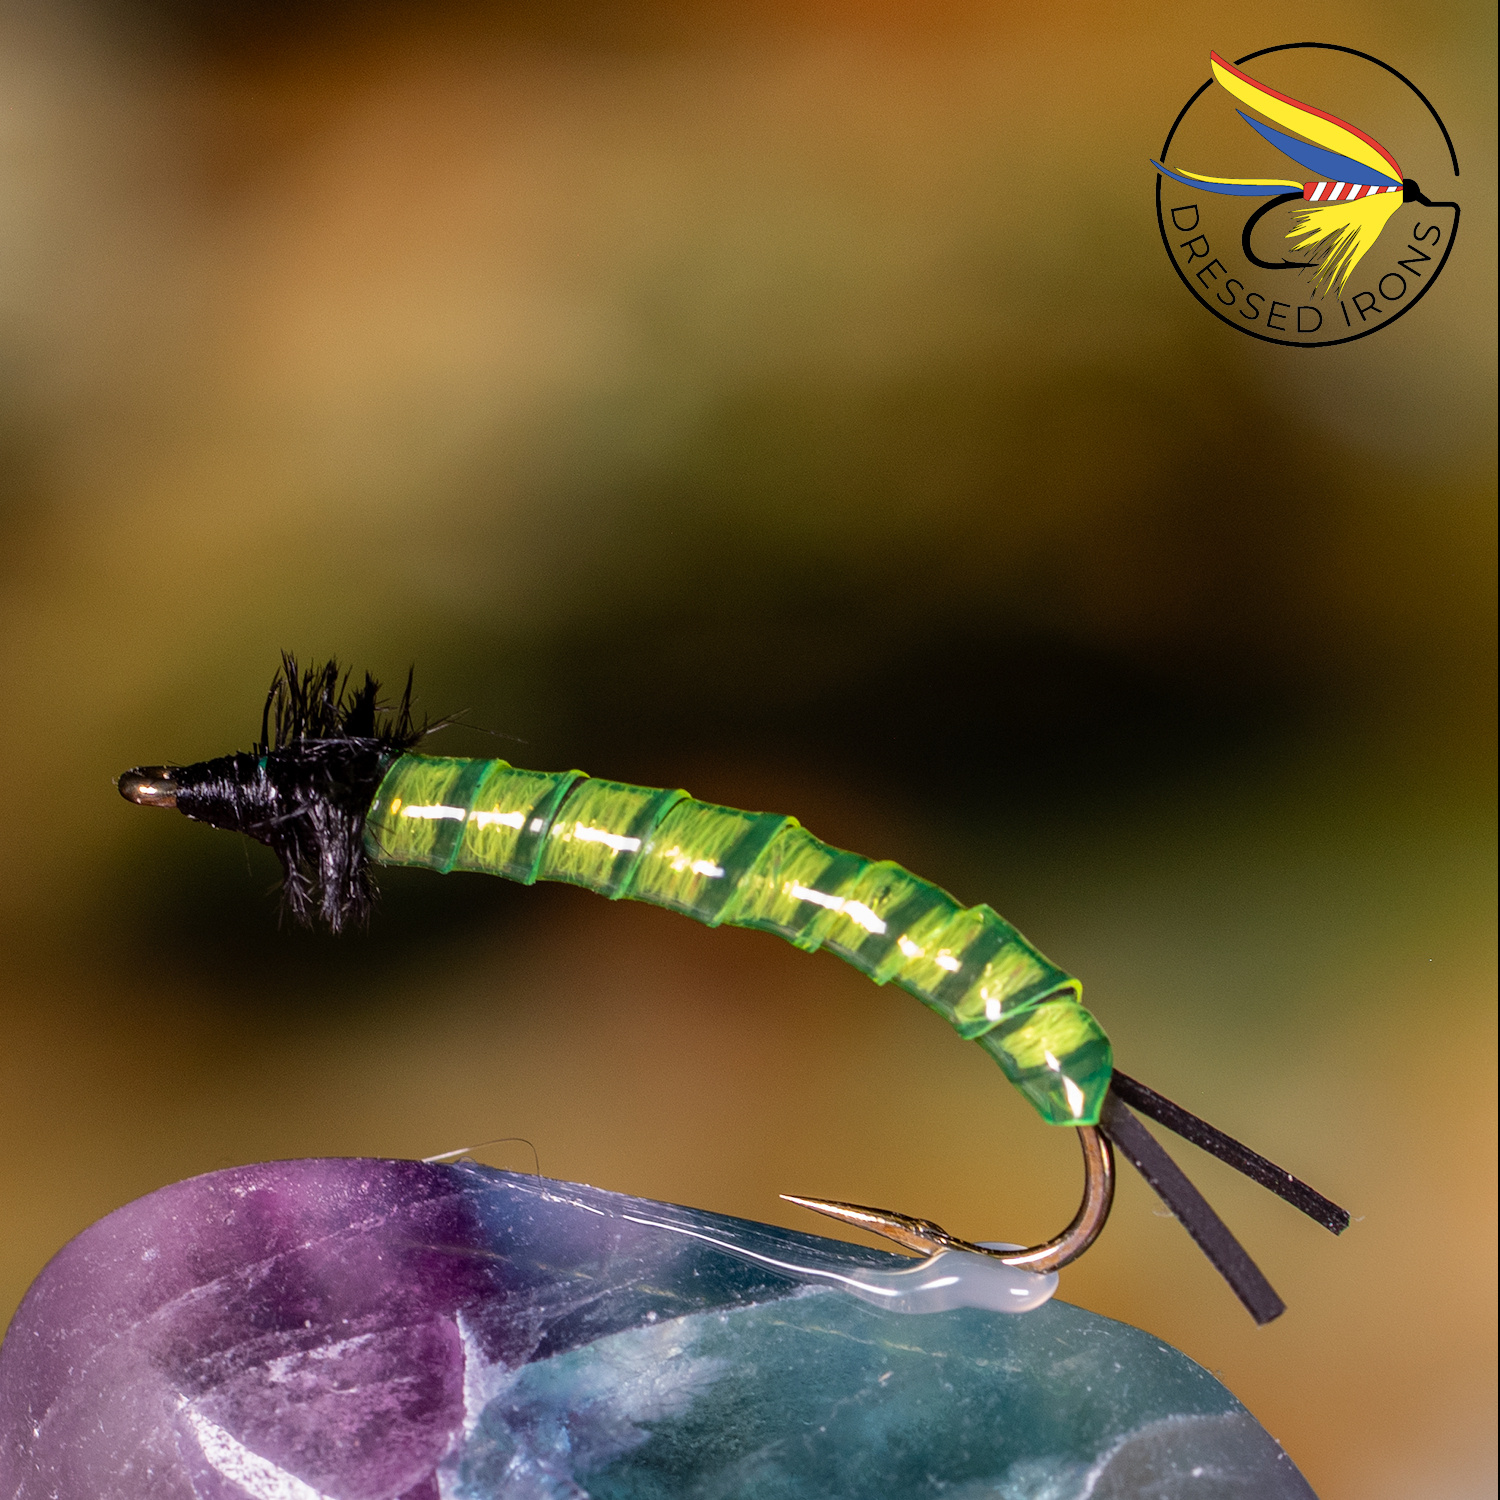
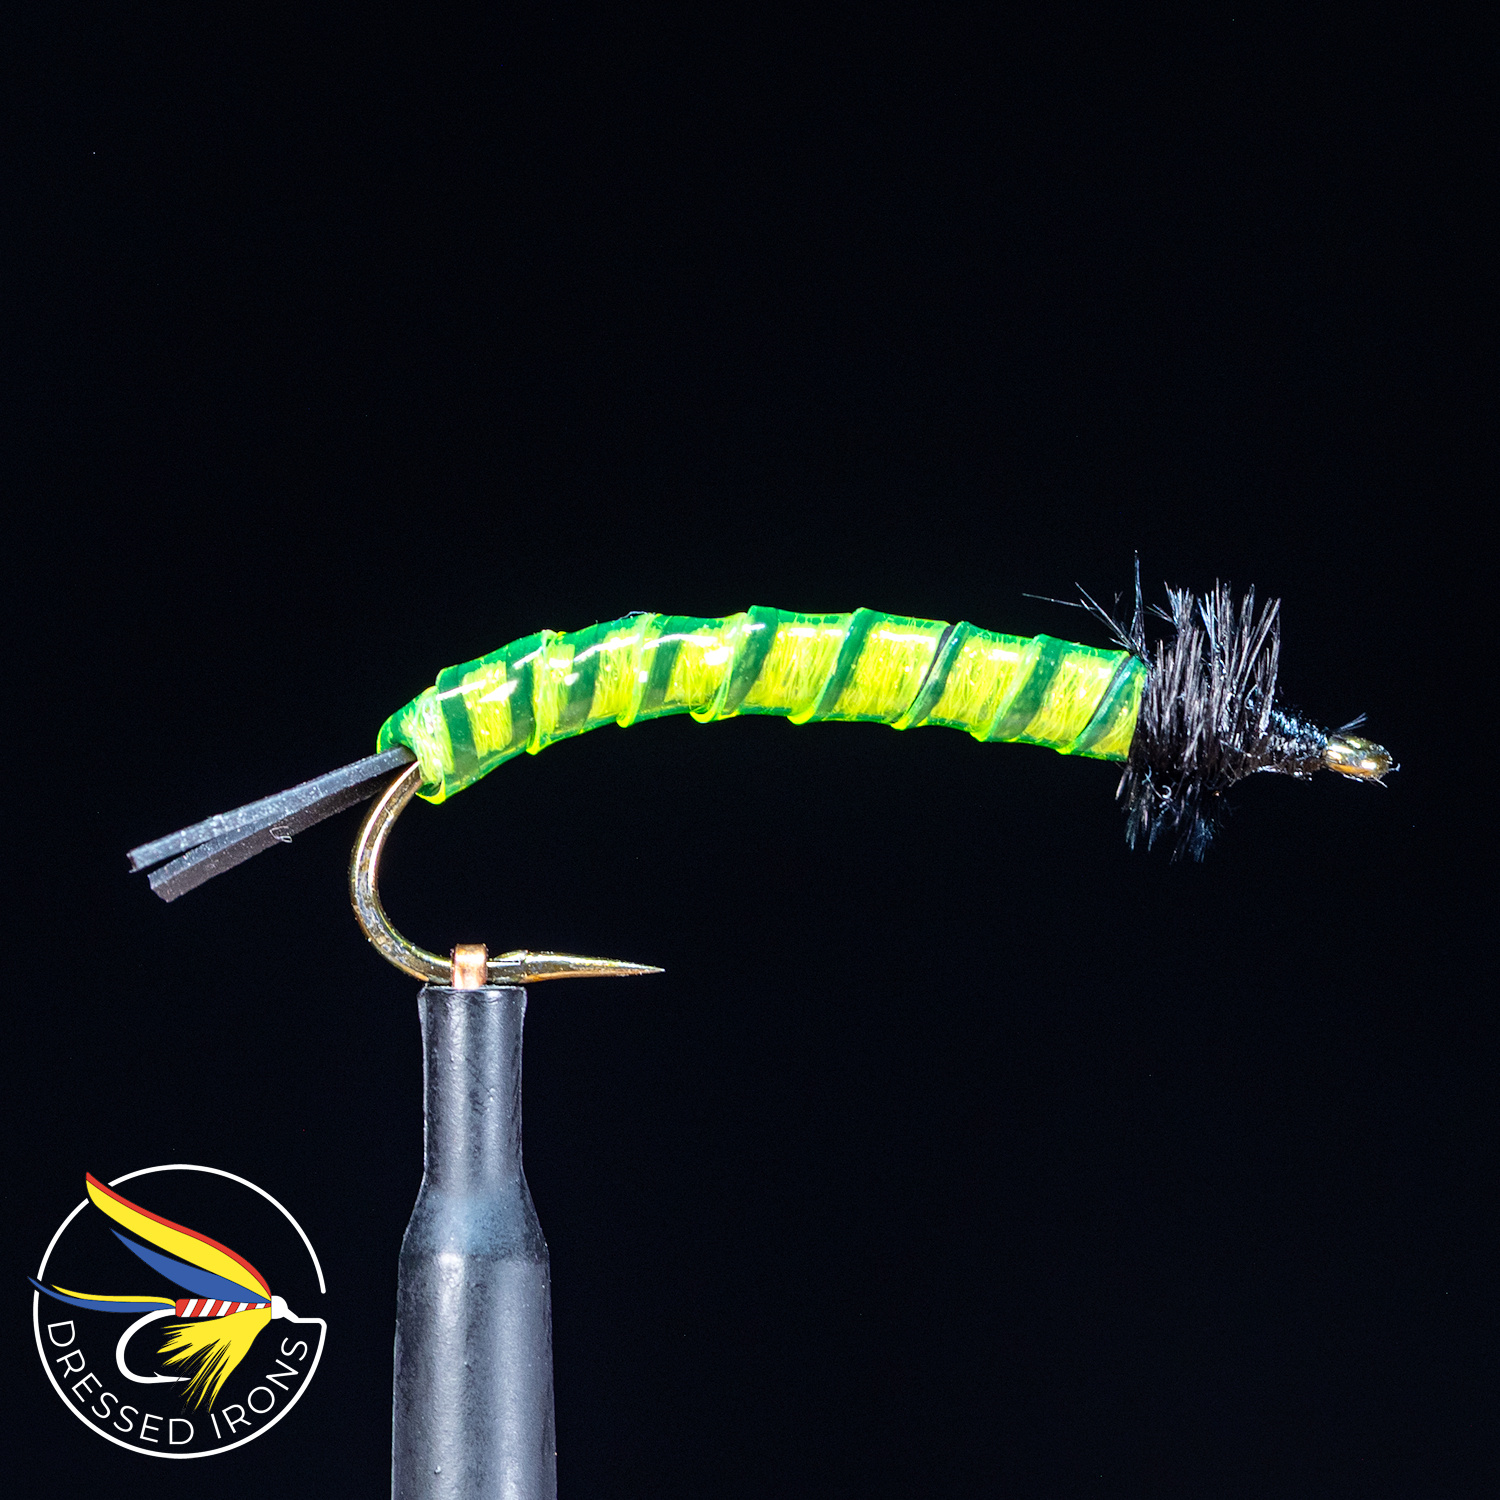
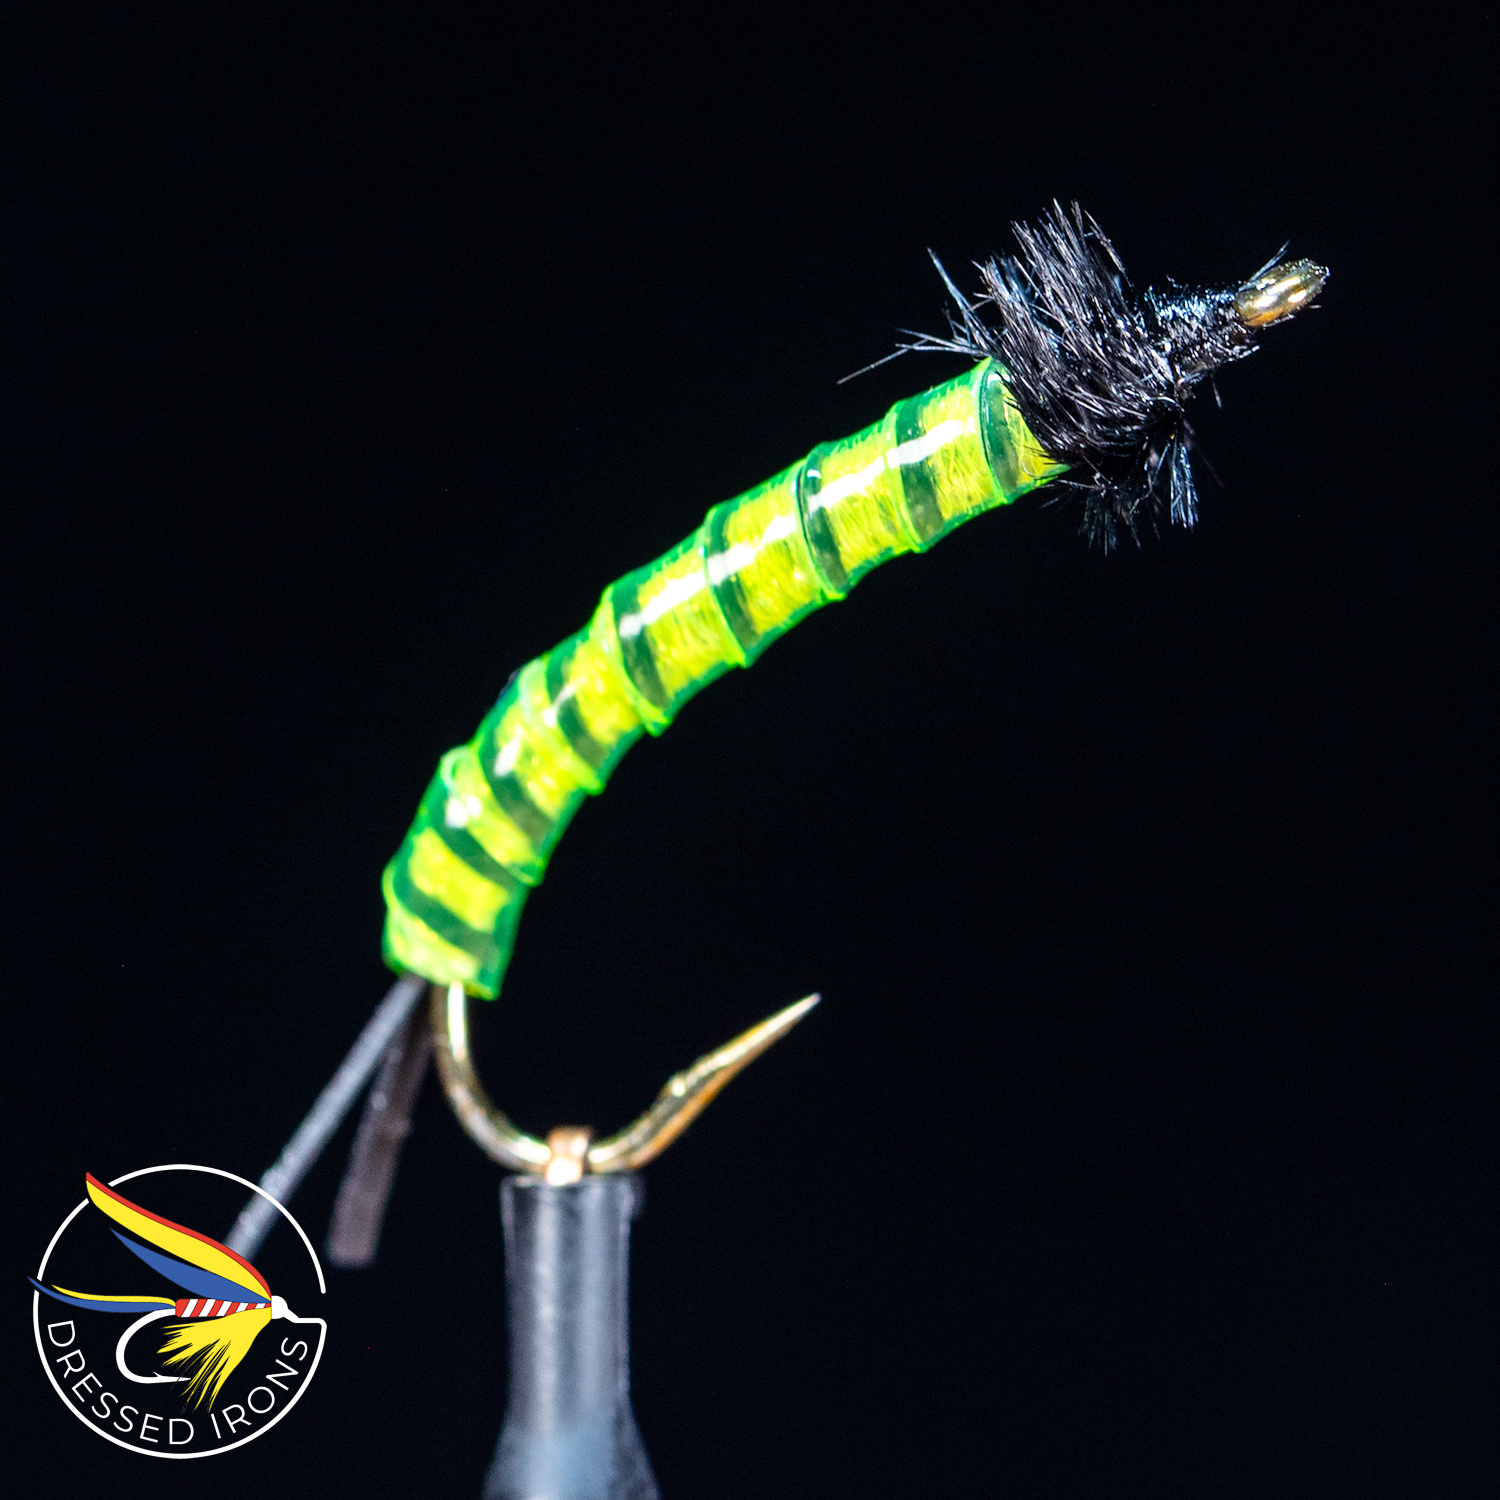
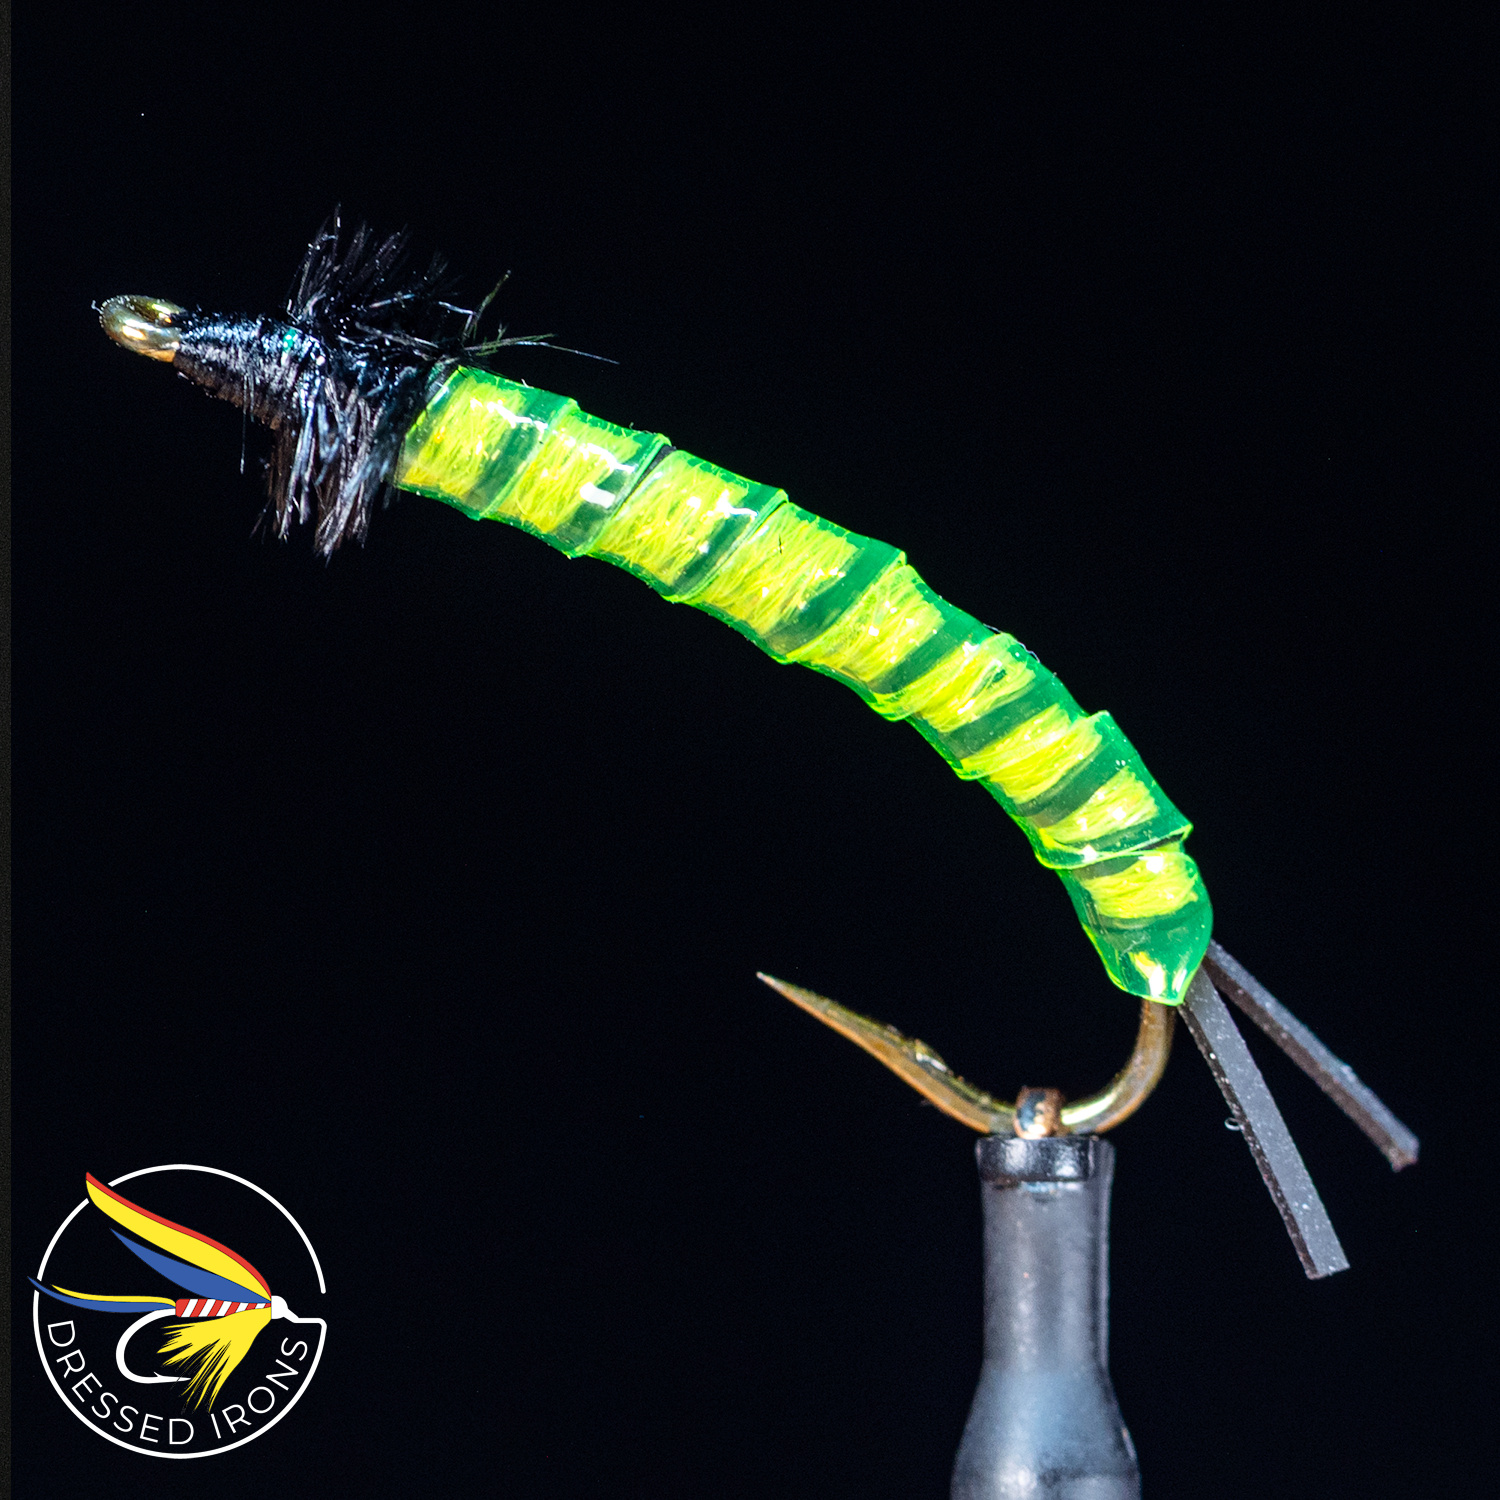
Remnant Fly 43 - Caddis Nymph
This is the 43rd fly in a series of flies I call Remnant Flies. If you haven't seen the introductory video on the Remnant flies then head over here to view it - diflytying.locals.com/post/1559443/remnant-fly-introduction-dressed-irons.
The latest Remnant Fly is a Caddis sort of nymph. It started out as more of a larger panfish nymph but as it evolved it became for of a caddis fly. Not that it can be used for panfish but it more resembles a Green Rock Worm nymph. --Enjoy
Hook: TMC 200R, #6
Thread: Danville 6/0 in White and Black
Tail: Micro Sili legs, Black
Body: Chartreuse Flay Mini Braid, Black Micro Sili Legs, & Chartreuse Edge Brite
Hackle: Black Ostrich Herl
Weight: Lead Wire
As I continue the Remnant fly series this and all future Remnant flies will be only on Locals (the Dressed Irons Guild) for those who support the community. After a year (or so) of being on the Guild community I will then publish them to everyone on YouTube. Exclusive content is one small way to thank those who ...
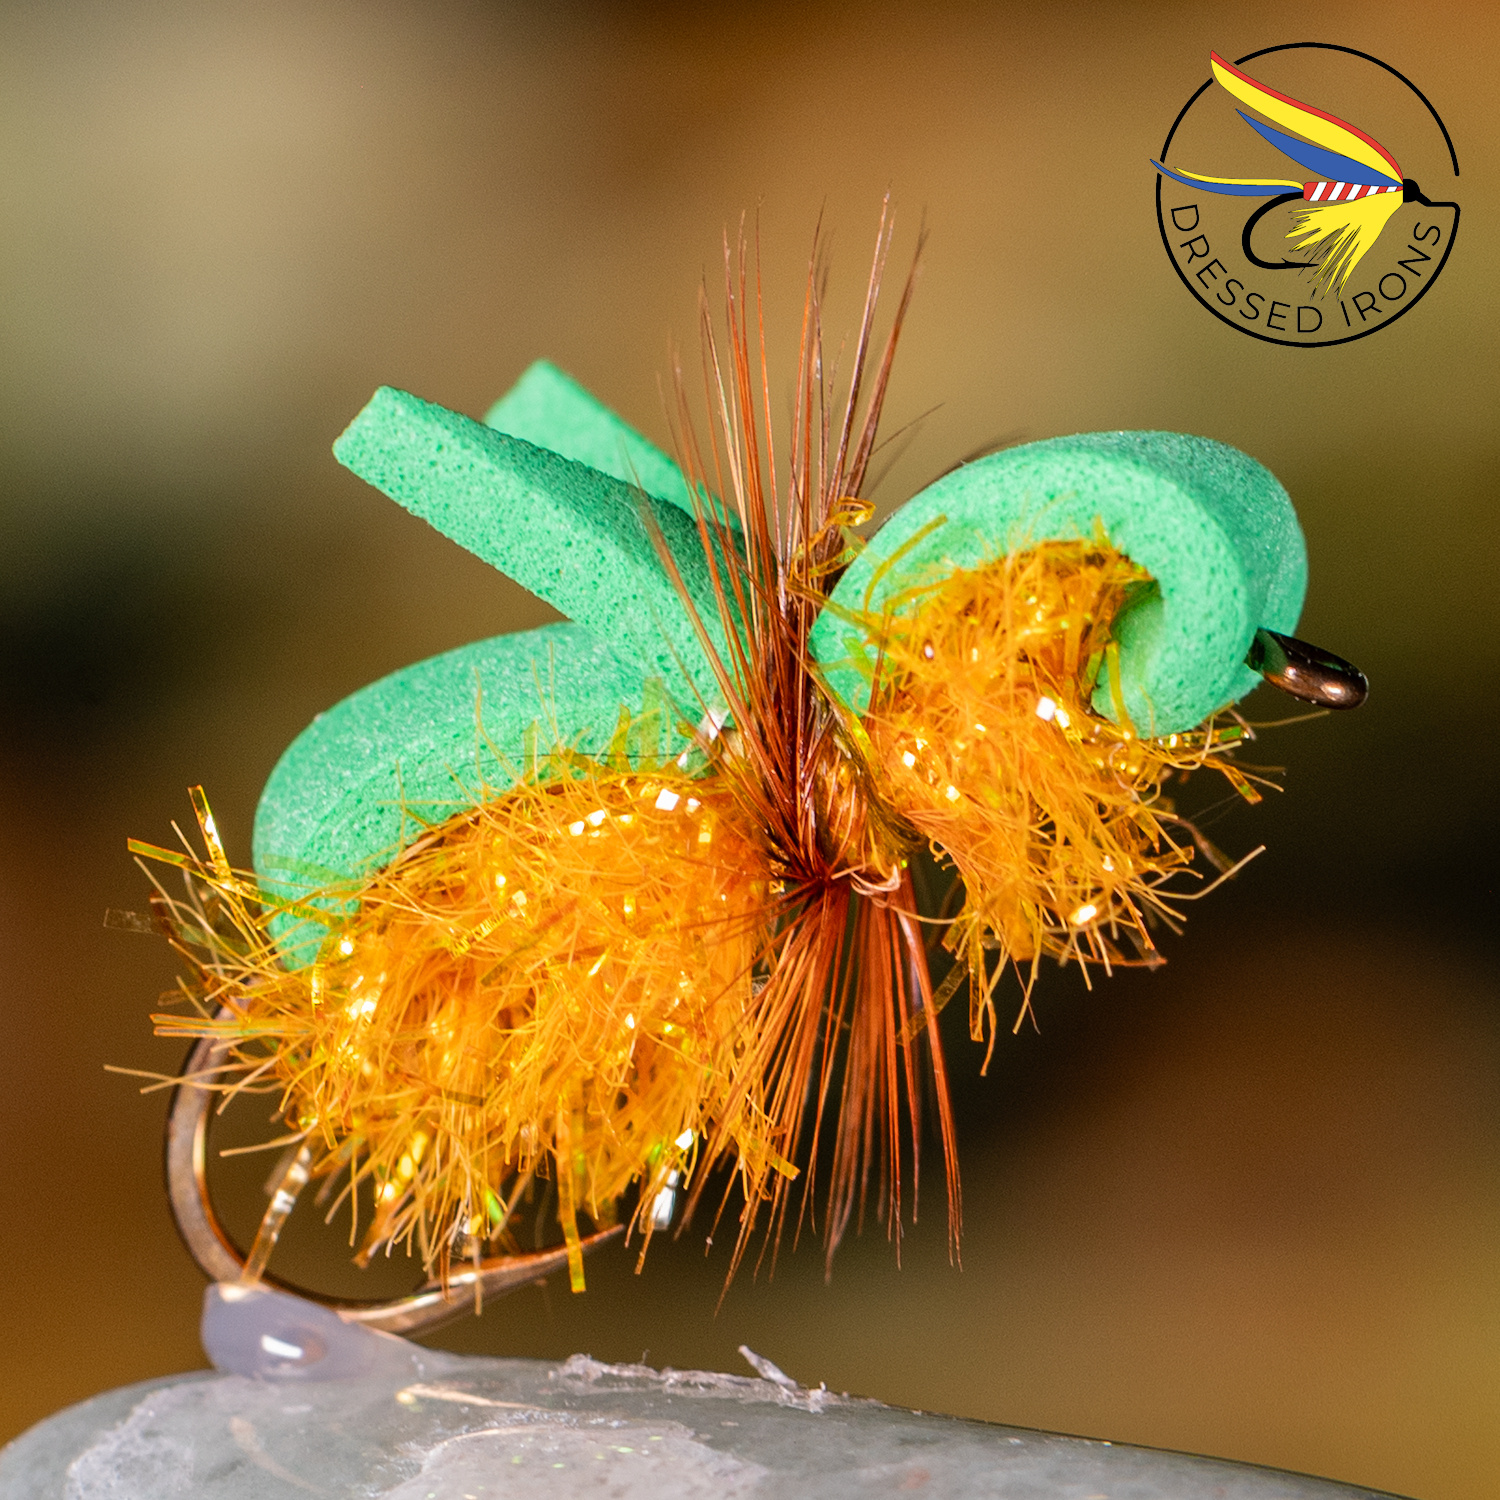
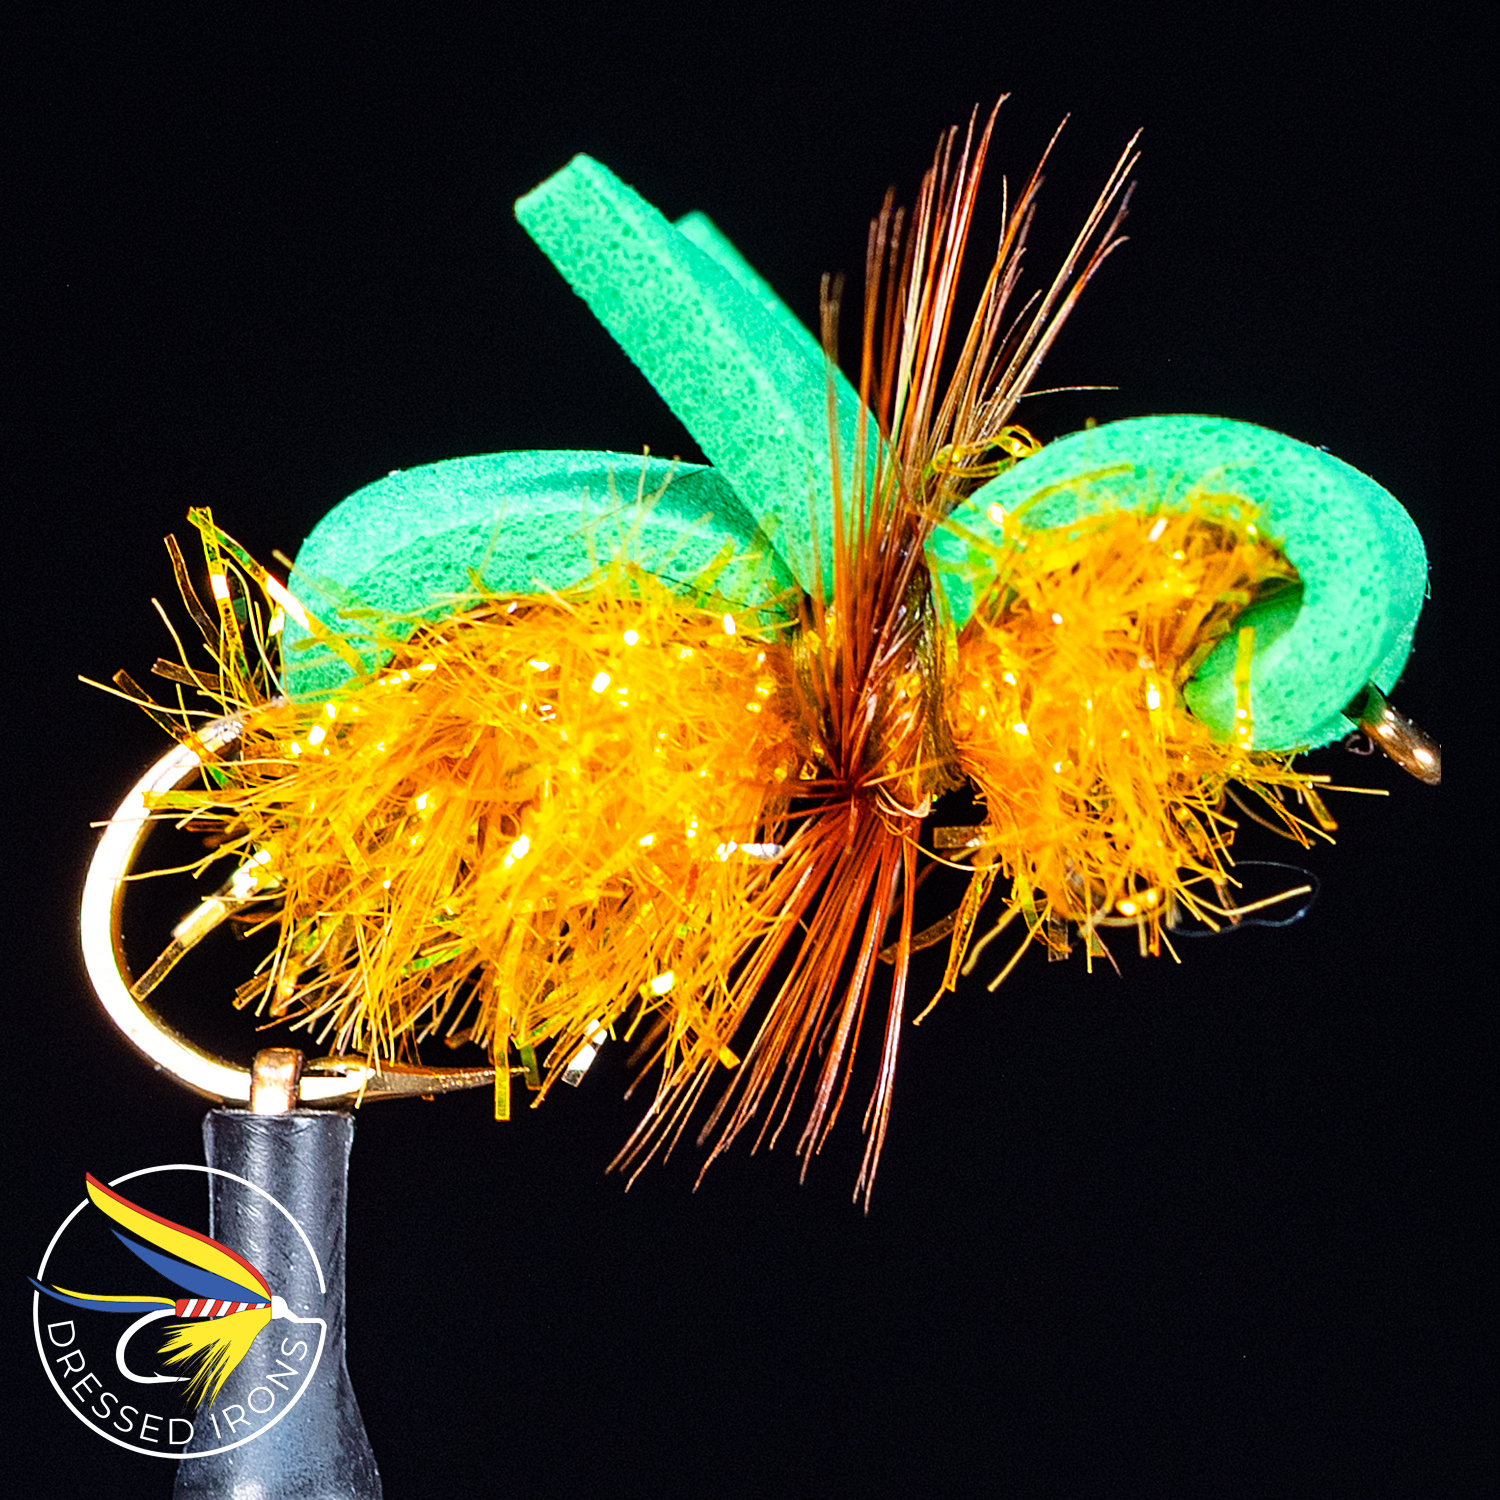
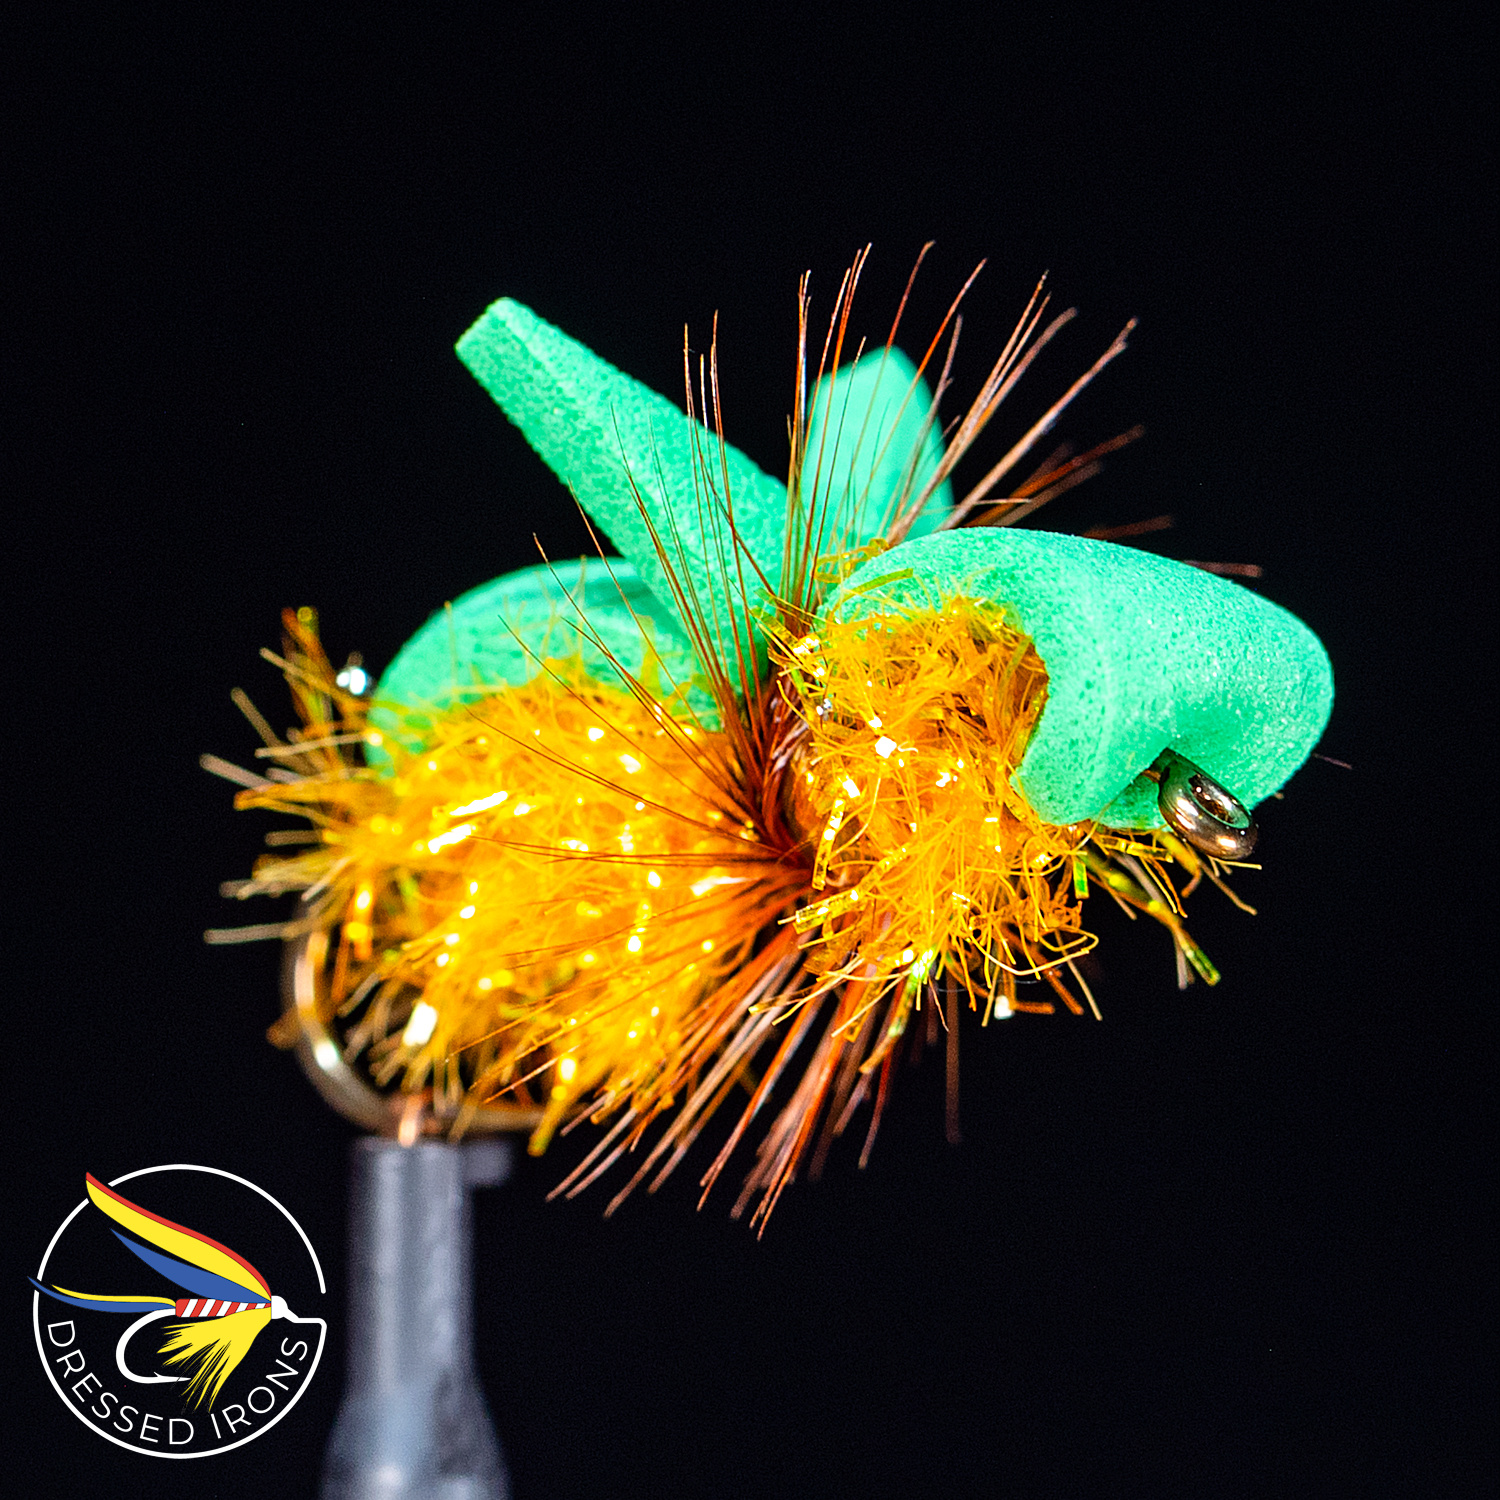
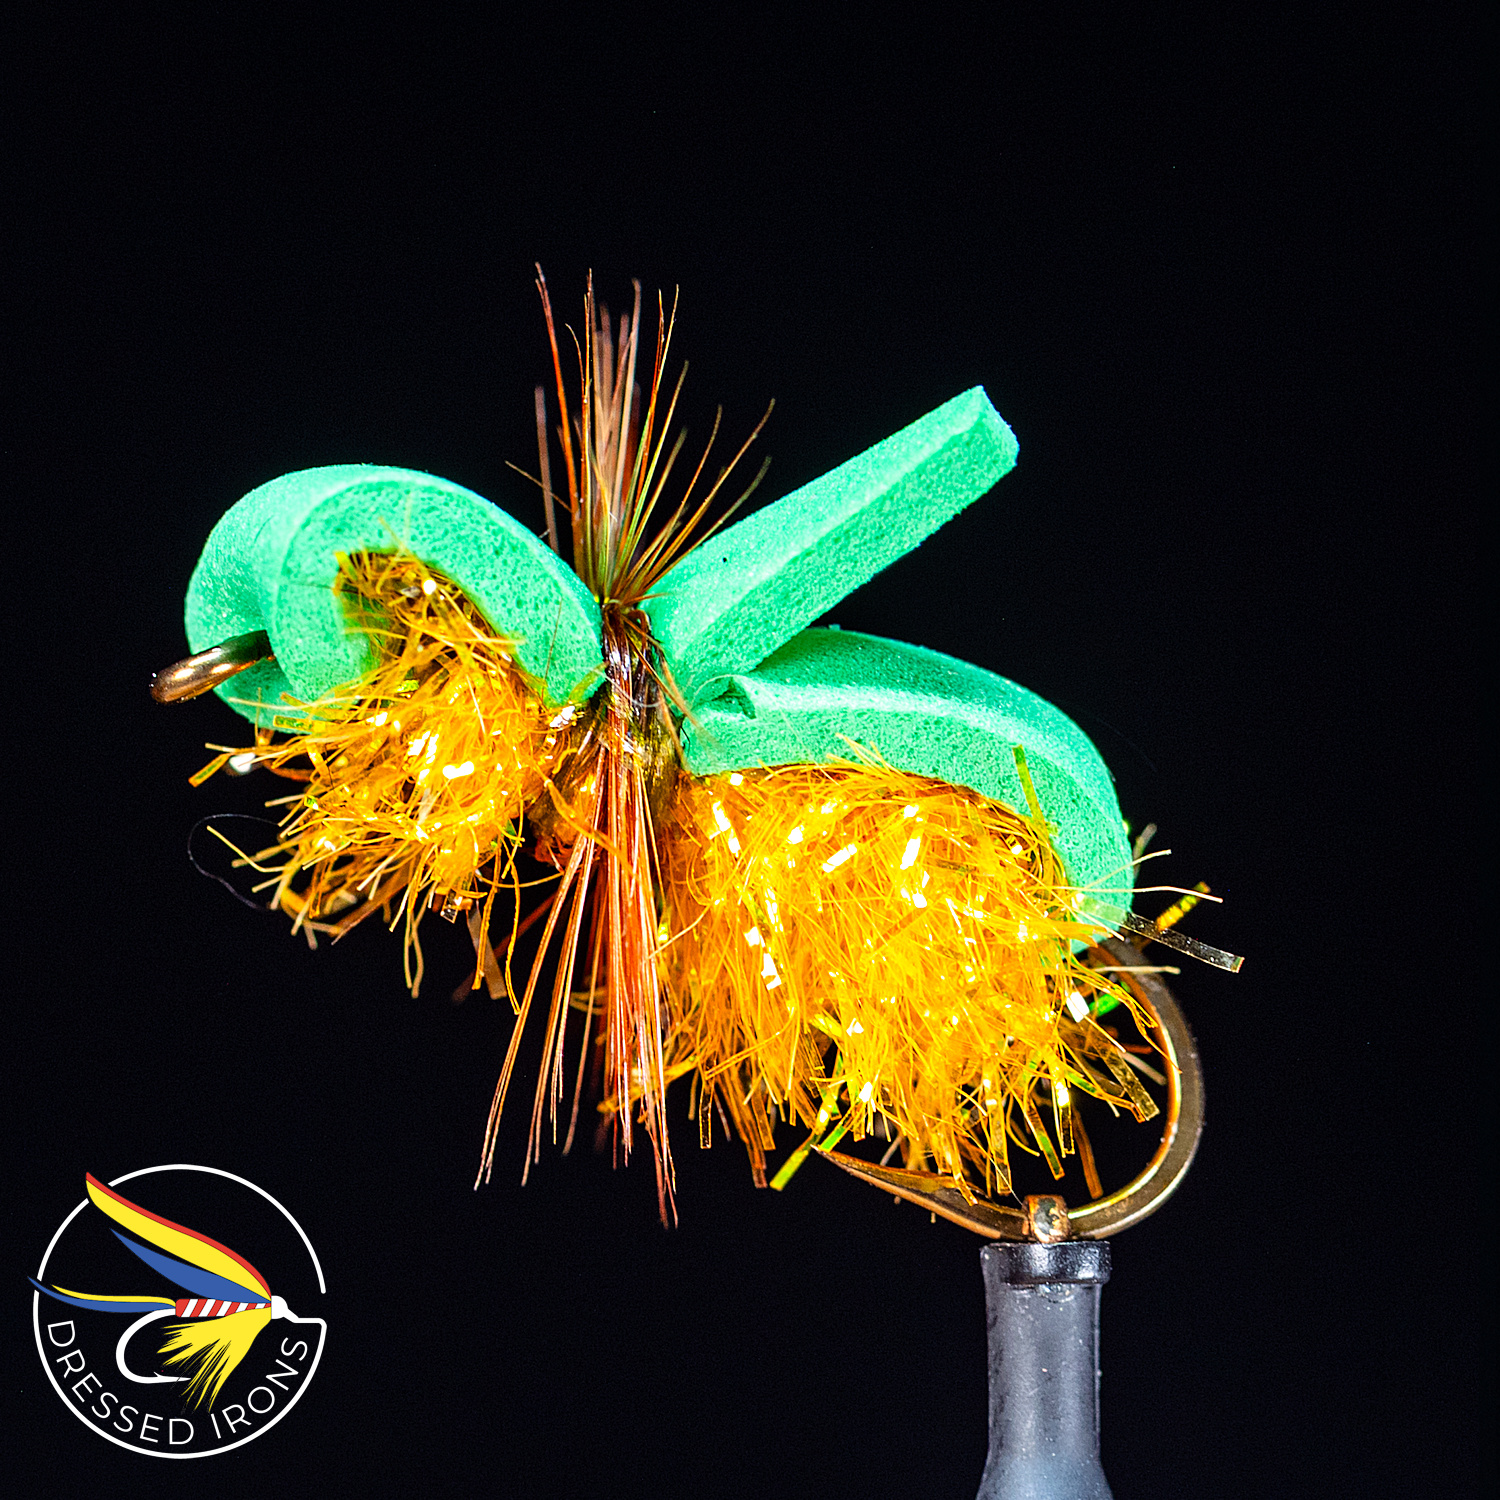
Remnant Fly 42 - Beetle
This is the 42st fly in a series of flies I call Remnant Flies. If you haven't seen the introductory video on the Remnant flies then head over here to view it - diflytying.locals.com/post/1559443/remnant-fly-introduction-dressed-irons.
Subscribe for more fly tying videos like this one: https://bit.ly/3sfHYOR
The latest Remnant Fly is a beetle sort of topwater fly. I was thinking about the panfish and bass topwater bite starting soon and ran across some 2mm foam in my kit and decided to try a small beetle like fly. I think it turned out well. I started with the olive thread and had planned to change to Chartreuse but forgot. Maybe some rubber legs and longer hackle might make this more buggy. --Enjoy
Hook: Mustad 9273, #8
Thread: UTC Ultra Thread 140 Denier, Light Olive
Body: Orange Estaz & 2mm Foam, Green
Hackle: Rooster Dry Fly Hackle, Brown
If you have any questions about the tying of this fly feel free to let me know in the comments below.
You can also reach out to me through the contact form on ...

To Barb or Not to Barb?
Improve Your Fly Tying Bad News
In all the years I have been teaching fly tying there is one question I am often asked and just as often the person asking does not like the answer. The question is “how do I improve the quality of the flies I tie”? The simple answer is “tie more flies”. I think this is often taken as bad news because they are hoping there is particular fly or technique that will be a shortcut to better flies. Sadly, fly tying is like most human endeavors, practice makes perfect.
I also think that this is taken as a negative because most people who start tying their own flies do so to “save money”. Therefore, when I tell them to tie 200 Woolly Buggers (in whatever color and size they want) the response is usually something along the lines of “but I don’t need 200 Woolly Buggers”. I can understand that but they do NEED to improve their fly tying. In the end, for most, they keep stumbling along and only tie what they need or a hot new fly they discovered and continue to complain because their hackles get tied in wrong, their dubbing is lumpy and they just can’t get the whip finish knot.
Don’t get me wrong, I am not admonishing people for the decision to not tie LOTS of flies to better their skills. On the contrary, it is supposed to be fun and if they would rather remain at the skill level they are and focus on spending time on the water good for them. Hell, in some ways maybe I should learn something there. For me, fly tying was always more then just making bait to catch fish. It was the other side of the same coin as fly fishing. I never considered one without the other. This means that in order for me to be a good fly fisherman I also have to embrace fly tying and learn/strive to make good flies. I could not call myself a fly fisherman if I only tied flies and never fished (and I taught a few of those people as well over the years). At the same time, I could not call myself a fly fisherman if I only fished and never tied any flies. To be a good fly fisherman I have to be good at both.
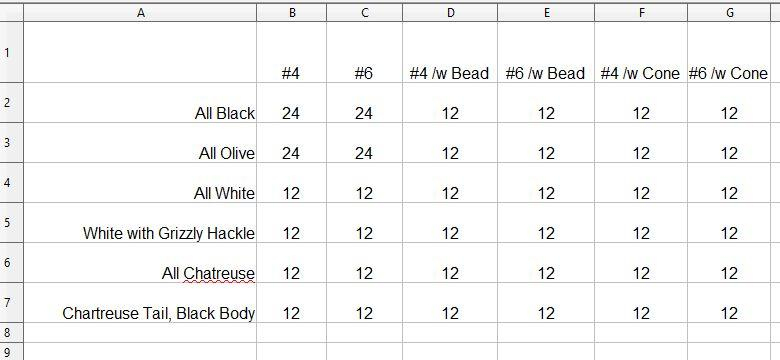
About 20 years ago I decided to take my fly tying to the next level. I set out a grid (six by six I think) and wrote on the left side next to each row a color and bead combination of Woolly Bugger I wanted to tie. After I completed each row I listed across the top of the columns the size hook I wanted to tie these on and whether they were bead head or not. Then I entered into each square the number of flies of that fly to tie. Most all were 12 with the all Black and Olives being 24 (of course). In the end I set out to tie up over 450 flies. Keep in mind, I was smart enough to add all them up before starting, no point in psyching myself out before I even get started. Then I simply got the materials and stated tying. I tried to tie at least 3 or four flies a day and many days tied up half a dozen or a dozen in an evening.

I got up to around 60 and started noticing I preferred certain rooster hackles for the fly and that not all marabou feathers were alike. Certain marabou feathers worked better than others for the tail. Around 150 I started to notice I was tying in the chenille body in the same manner on each fly and getting the exact same number of wraps for the body. Around 250 my tails were all coming out the same length and profile, my bodies were looking consistent and I was wrapping the rooster hackle the same number of times on each fly thus producing consistent flies. Somewhere around 350 I realized I did not have to cut the hackle off once wrapped but rather I could fold it back and make the head of the fly over it slightly and simply ‘snap’ it off after whip finishing. All in all, it took me about four months to tie all those flies (two very young girls in my life took much of my time). I still have about 200 of those flies left and suspect my grandson and I will be out fishing them before too long.
What did I learn from this experiment? First, if you want to get better at something you have to repeat it A LOT! It is not good enough to just know how the fly is put together you have to understand the subtleties of the materials and the way the fly is put together. I wouldn’t go so far as getting Zen about “becoming one with the fly” but it’s pretty darn close. The other thing I learned is that there is not “master” level of fly tying that one can obtain because each and every fly presents it own challenges and thus it’s own learning curve to master that pattern. After tying way more flies over the last 20 years I have realized that my skills are good but if there is a pattern I really want to tie for a friend, for sale or to do a video on I will tie at least 100 to really get the fly down. For production tying, I will tie more like 200 or more before I finally have it down to the point each fly is looking like the previous one.
So, in the end I can understand why most people do not like the answer “tie more flies”. Most people do not want to take it to the level I do and there is nothing wrong with that. As a consolation I remind them of what Dave Whitlock once said, “if you want to tie better flies, tie a fly a day” (ok, so that might not be the exact quote but the gist is tie at least one fly every day). So you can tie 400 flies in about four months or in 400 days. Either way, your skills will be better on that 400th fly then they were the first.
Remember….. It’s Fly tying….. If you’re not having fun, You’re Doin’ It Wrong.
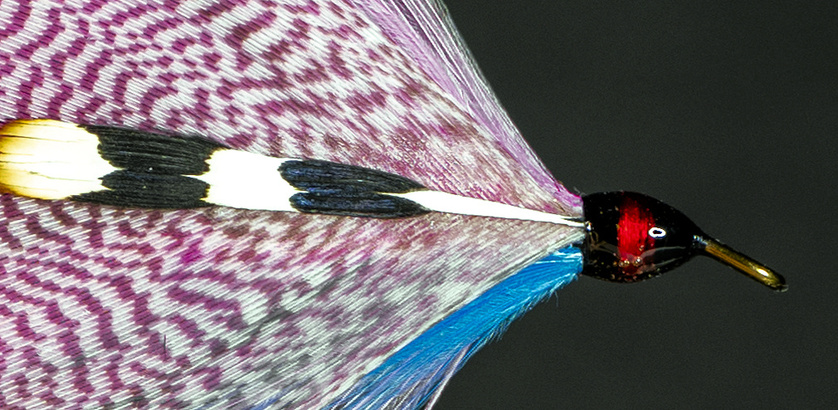
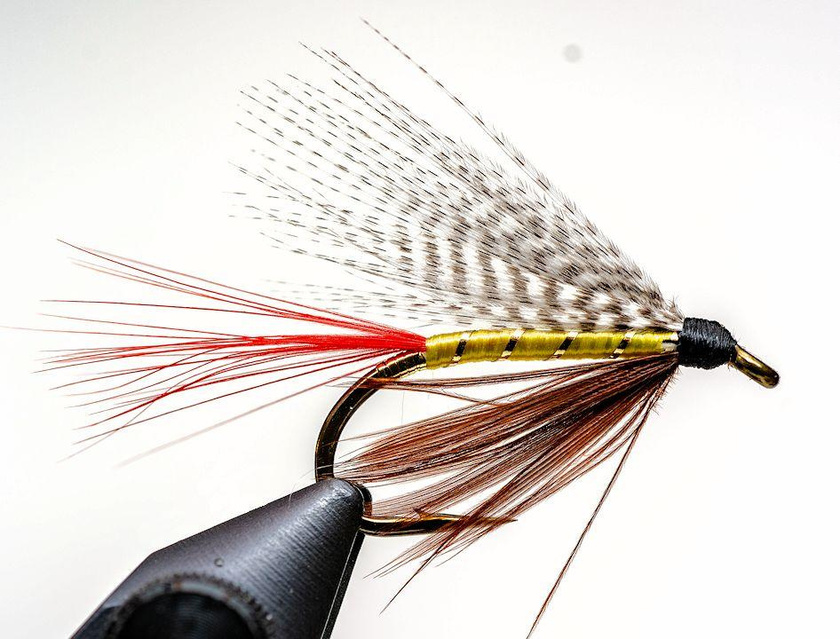
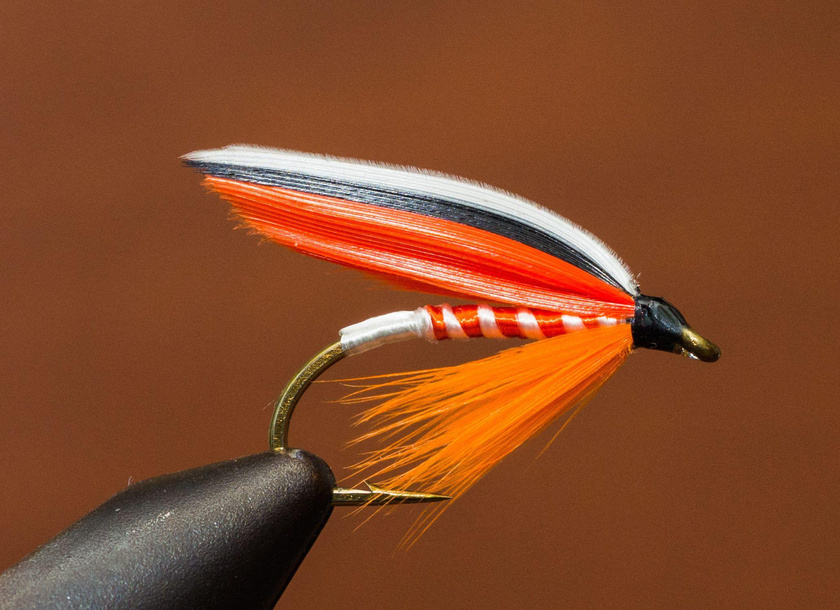
Carrie Stevens Signature... Should you or Should You Not?
I was posed the following question in a comment on a recent YouTube video and wanted to share my resonse with everyone in the Guild to see if they had an opnion they would like to share.
QUESTION.. do you think it ok for you to put the red thread band on carrie stevens flies you tie since its believed to be he signature. Just asking.
The following is my response. Looking forward to hearing other people opinion!!
********************************************
First, I would like to thank you for posting (and posing) this question! The use of the bands of color in Carrie Stevens patterns has been a controversy for many many years. I can totally understand why and respect anyone's desire to NOT include the bands as it is thought to be her signature and since the fly is not being tied by her it should not be included.
Second, I apologize for not getting something written up sooner but I wanted to think the matter through, do some digging and most of all make certain that my response (i.e. 2 cents worth) does not come off as pretensions or snooty. All to often when communicating through text, emails, comments, etc... we fire off a quick response as though the person where right in front of us. Unfortunately, they are not so they do not get to hear the inflection in the voice nor the affect presented by the person speaking and thus have to “reads between” the lines with that being read the wrong way and coming off as “uppity” or callous. I do have my own two cents on this subject but wanted to make certain that you know I welcome other peoples views on fly tying topics. Even if in the end we do not come to some consensus we certainly should be able to discuss topics and share thoughts and ideas. So, again I say, Thank You for posting this question and this topic. By the way, I do not know how many characters are allowed in a comment or a reply so all of this might end up in more then one reply.
Now, to the heart of the matter... When I first started tying Carrie's patterns many years ago I was not aware that the colored band (other then the multi colored ones like in the General MacAuthur or the America {which are Red, White and Blue}) included in her recipe was considered a signature and that many people did not include it out of respect for Mrs. Stevens. Somewhere back in 2007 I purchased a copy of Don Bastian's DVD Traditional Streamers & Bucktails with Don Bastian ( https://www.bennett-watt.com/products/traditional-streamers-bucktail-with-don-bastian ) and in the tying video for the Gray Ghost he mentioned how he does not include the band of color out of respect for Ms. Stevens. I highly recommend this DVD by the way, very informative and well worth the money. So, this got me thinking and doing some research. Two resources I went to were the Hilyard book, Carrie Stevens Maker of Rangeley Favorite Trout and Salmon Flies and Forgotten Flies - Paul Schmookler & Ingrid V. Sils. It is mentioned in the Hilayd book that some tiers do not include the band of color because they feel it is her signature and it is not needed since she is not tying the fly. However, I did notice that in both of those books certain Stevens patterns were tied by someone other then Ms. Stevens and the bands of color were included in the photos and recipes for the books. Most that were not tied by Ms. Stevens in the Hilyard book do NOT have the band of color but a few do. At the time I simply logged it in the back of my head as I was not tying many of her flies and then usually only when teaching them in a tying class. Little did I know at the time there were a number of things I was doing “wrong” back in those days when it came to constructing one of her flies.
Jump forward a few years and the Streamers365 project was launched. The Streamer365 project website is not now active but it has been copied over to the Global Fly Fishers site and you can access the content there ( https://globalflyfisher.com/streamers365 ). I bring this up because I do recall seeing a number of Ms. Stevens patterns being submitted to that project that did have the band of color in the head. Not that everyone else doing it makes it right, they could also have been making a mistake (knowingly or unknowingly).
So about this time I formed the following opinion on this subject. I am not tying these flies to sell which is not to say I am not profiting off of them but I am not tying them just to sell them nor am I passing them off as my own creation. I don't know that I have ever even gotten any of her flies I tied even wet (I hope Ms. Stevens is not rolling her eyes at me)! I have mounted a few and have projects in the works for framed flies to be given away to friends. My purpose it to learn how she tied her flies (to the best of my abilities) and to document/record the process, the entire process, to pass along to future generations the innovative techniques she created (especially being self taught). Not to mention the productive flies!. That said, I feel I need to include the bands of color to do a complete job of representing her fly(s) and her tying style. If I do not include this little item that she included in some of her flies than I am not truly honoring her and her contribution to fly fishing and tying.
That is the view I have had for a number of years and it has since been reinforced a few years ago by the following. The late Don Bastian had a blog that he contributed to for many years. Fortunately, it is still active ( https://donbastianwetflies.wordpress.com/ ). There are two articles he wrote that gave me another perspective on this topic. In one, he talks of how when Ms. Stevens sold her tying business to H. Wendell Folkins in 1953 she specifically stated that any of her flies that had the bands of color in the heads had to continue being tied with the band of color ( https://donbastianwetflies.wordpress.com/2012/02/02/carrie-stevens-and-elizabeth-duly-sisters-pink-lady-streamers/ ). This tells me she was more interested in keeping the patterns intact and if nothing else identifying it as a Carrie Stevens fly. Secondly, Carrie's sister also tied some of Carries flies and she included the bands also.
“To me, the fact that her sister incorporated Carrie’s band into her fly reinforces my belief that the color band was not Carrie’s signature, as much as it was a component of the fly pattern itself. H. Wendell Folkins, to whom she sold her business in 1953, was given specific instructions by Carrie Stevens to continue the use of her color-banded heads. I believe it is a tribute and sign of respect in recognition of a Carrie Stevens pattern to use the banded heads. I personally came to this conclusion last summer after more than 20 years of tying Steven’s patterns without the bands. “ - Don Bastian
In another article on his blog he wrote ( https://donbastianwetflies.wordpress.com/2011/07/26/streamer-four-packs/ ),
“While some fly tiers may consider the banding Carrie’s signature, it is important to note that the colors she used are also integrated into the pattern design. She used different threads for the head and different colors for the band; like a red head with a black band on the Colonel Bates, black head with red band on the Gray Ghost and many others, a black head with orange band as on the Big Ben, and on the America, Casablanca, and Victory, what else but red, white, and blue. This triple-banded head is also on the General MacArthur. I suddenly asked myself: “How can I tie a General MacArthur with a black head?” “ - Don Bastian
Ultimately, as I stated, I think to honor Carrie Stevens one must include the bands of color as she included them in the recipe. That said, if a person chooses not too I am fine with that. I have yet to read anywhere that the colors improve the productivity of the flies or detract from them.
I am still on the path to learning more about her flies as well as learning just how she tied them. No doubt some things I am doing and explaining in some of the videos today will be countered in the future as I learn what I do not yet know. It is possible that at some point in the future my mind will be changed on this subject as well. I remain open and receptive to hearing what others think on this topic and look forward to a lengthy discussion.
Thanks again,
Ian Anderson
**********************************************************************************
Let me know if you have a hard time reading this or the links do not work. I will do what I can to correct it. - Ian